What does a Garden Gnome do when she is not gardening, in the kitchen or doing genealogy? Well the answer might just surprise you so read the entries to find out more. This blog focuses on everything we do to make our house a home. There will be a strong emphasis on home energy efficiency and do-it-yourself (DIY) projects. At the same time there will also be crafts, knitting and crocheting projects along with any other little tips we do to create that down to earth, I want to be here home. Please enjoy your visit :)
I routinely clean out our refrigerator on a weekly basis but not the deep purging that sometimes becomes necessary. When our kids were young we did a fair amount of camping, quite often every weekend possible as well as extended camping trips. We had a large RV with good size refrigerator so I got into the habit of making a few things like salads and meals like lasagna or chili to take with us. The day before I'd turn on the refrigerator then once cooled would pack it with any specially prepared camping dishes as well as things like eggs and condiments. So basically food we would have used at home simply went right along with us. This saved us a great deal of time and money because it really lessened what we had to buy when we got to our destination. I do the same thing for any extended boating trips. Now that we have the vacation home I had to change that game plan. The main reason is logistics. If we fly out we are restricted what we can bring and if we drive we are also restricted due to the length of the drive. Furthermore, there are border (US Customs) restrictions on the way down and back (CDN Customs) as to what can enter into the country so mainly the beautiful local produce I am so used to has to be left at home.

About 10 days before leaving for the vacation home I start paring down the refrigerator contents. If we run out of something, we simply go without. This provides the perfect opportunity to clean the refrigerator from top to bottom as well a cull through any sauces, cheeses or leftover bits it jars and bottles. Anything unopened with an expiry date after we plan on returning is returned to the refrigerator after it is cleaned.
Cleaning the refrigerator in this manner helps to control any of the clutter that just seems to happen. I have a bad habit of wanting to try a sauce or gourmet type item that only uses a small amount for the dish but the bottles end up being left in the refrigerator just in case. Here's my method for deep cleaning the refrigerator:
- remove everything from the refrigerator
- cull though items checking for expiry dates
- fill sink with hot, soapy water
- remove crispers, cheese and meat keepers
- wash the inside compartment from top to bottom
- wash crispers, cheese keeper, meat keepers
- drain sink and refill with hot water and about a half cup of baking soda
- wipe down the inside compartment from top to bottom
- rinse the crispers and keepers with the baking soda solution
- dry inside compartment, crispers and keepers
- replace crispers and keepers
- replace the food items that are being kept
The refrigerator is now ready for another round of abuse. I say this with tongue in cheek but like anyone our refrigerator takes a fair amount of abuse especially during the heaviest of the canning season when things tend to get pushed to the back and accidently forgotten. Other periods of heavy use like having all the kids home or entertaining also take a huge toll on the refrigerator. I try to do this type of refrigerator cleaning at least once a month in addition to my normal weekly refrigerator cleaning.
Garden Gnome
©2006-2010
I can on a Jenn-Air® customized slide-in range with cartridges so that I can change the stovetop features as desired. I bought a special canning element to customize one of the coil cartridges.This time of year my stove takes a huge beating! While I can year round usually at least once weekly this is the busiest of the canning season when I am canning oodles of tomato products. That means the canners run two or three times a day.
The problem with both boiling water bath (BWB) and pressure canner (PC) is both spew out water droplets over the stove surface. The PC spits out water droplets but only until it comes to pressure whereas the BWB canner spits water droplets during the entire canning process. These water droplets seem harmless but they turn into ugly black spots on the stove. Compounding the problem is the splattering from various sauces cooking prior to being canned.
As you can see the canning cartridge becomes quite unsightly. Quite frankly I could leave it as is because the cartridge is only on the stove for canning so no one really sees it other than my husband or me but that's not the point. I don't like it looking this grungy. When I canned on a regular stovetop I had the same problem so I learned a few tricks to cleaning up after a canning session to keep the stovetop looking good.
One of the best stovetop cleaners I've found is Bar Keepers Friend. This cleanser comes in both powder and liquid form. I like the liquid but they both work well and it is one of the best commercial cleansers I've found for stainless steel. It's one of the very few commercial cleansers I buy. This cleanser contains citric acid so it is quite effective on most surfaces including smoothtop stove surfaces. A 13 oz bottle costs $4 so is a fraction of the cost of other smoothtop stove cleansers.
Pictured is the cleaned stove cartridge. It's not perfect but it looks a lot better than after the canning session. The majority of the cleaning was done simply by wiping on Bar Keepers Friend, letting it sit for a minute then rubbing. Some small spots that remained were easily flicked off with the side of a paring knife tip. Once the busiest of the canning is over I will take the canning element out, clean the drip pan well and clean up the rest of the cartridge. Then I will be able to give the entire cartridge a good cleaning that will remove all of the spotting but for now it at least looks presentable.
Garden Gnome
©2006-2010
The average home cook will run the dishwasher at least 5 times per week. If you think about it most dishwashers use water, detergent and rinse agent so why would they need to be cleaned? Most dishwashers have some type of filtering system. These filters need to be cleaned from time to time. Water deposits can build up in dishwashers reducing their cleaning potential. This is especially problematic for those with hard water. If the inside of the dishwasher is not stainless steel there may be staining from some foods as well. All in all the inside of the dishwasher does require regular cleaning. What is the best way to clean the inside of a dishwasher?
- filters - Remove all filters and clean them under a spray nozzle or running water until they are clean. Check where the filters go to be sure the area is clean before replacing the filters.
- blockages - Certain things like labels on jars will gum up and blog the holes of the dishwasher sprayer arms. Manually remove any blockages. In future do not put any jars with labels still on them into the dishwasher. Don't put thing in your dishwasher that don't belong there and that includes things like ball caps and aluminum foil products as fiber from cloth as well as aluminum breaking down can cause blockages and/or discolourations.
- deposits - Hard water deposits can clog water lines, sprayer arms and leave spotting in the dishwasher. Clear the deposits by using a package of lemon Kool-Aid or 2 tbsp citric acid or 1 c white vinegar in the dishwasher then run a full cycle to clean out the deposits. If your water is hard and you don't have a water softener then do this cleaning at least once a month.
- stains - Certain foods especially tomato based foods will stain the interior of plastic lined dishwashers. The immediate reaction is to use bleach to get rid of the stains. Do not use chlorine bleach in your dishwasher! Bleach will damage rubber valves in the dishwasher causing more problems and repairs. Bleach can cause the gasket around the door that prevents water from leaking out to deteriorate. Stains can be removed using citric acid and they will naturally diminish over a few dishwasher cycles so just leave them alone. A Mr. Clean Magic eraser will help manually remove stains from the dishwasher as well.
Garden Gnome
©2006-2010
Shortly after moving here we installed a Bosch dishwasher. The drying action of this dishwasher demands a rinse agent so for awhile that had me scrambling to find a low cost rinse agent but I finally found one. Finding a good dishwasher detergent has been a horse of another colour. We live in a an area where high humidity is common during the summer months. Powdered detergent has the problem of clumping under humid conditions. The dishwasher tabs have the ecological problem of being the highest in phosphate concentration and while they do an excellent job of cleaning the dishes, they leave a stringy plastic residue in the dishwasher. The eco-friendly dishwasher tabs did not clean the dishes as well and they still left that residue. The off brand gel dishwasher detergent was cheaper but ended up leaving some of the dishes dirty on a fairly regular basis. So I'm back to looking for a dishwasher detergent that works.
I decided to pick up a bottle of
Finish® dishwasher detergent when doing our recent grocery shopping. A 1.6L bottle cost $3.49 so as dishwasher detergent goes the price was quite good. What I did not notice when I bought this dishwasher detergent is it is phosphate free! Now this is excellent and how I missed that little detail is beyond me because that is the kind of thing I always look for. So here is a product that is not only inexpensive but also eco-friendly. This dishwasher detergent is alco recommended by the leading dishwasher brands including Bosch. I've used it twice now and so far I really like the performance but I've learned from past experience that a dishwasher detergent can perform nicely for a few washes then for some reason fails to perform properly. I'm not sure why this happens only that it does happen. At any rate so far this dishwasher detergent does look promising so I am keeping my fingers crossed. Once I've gone through the entire bottle I'll report back as to the overall performance.
Garden Gnome
©2006-2010
Accidents happen around the house in the best of circumstances but when moving or settling in they are even more prone. This is the time that little nicks and dings often happen. While the nicks or dings don't affect the overall function they can make the appliance or piece of furniture look less than appealing. There are a wealth of repair kits available for doing quick touch-ups for most furniture and appliances. Most of these kits will cost less than $5 and with carefully following the instructions you can get a good, barely noticeable DIY repair.

The kitchen appliances in the vacation house are Maytag. Quite frankly for this repair brand did not matter because each appliance manufacturer uses a slightly different colour if white to the point that a matching washer and dryer may not exactly match. We are avid DIYers so that means even at the vacation house we will do it ourselves if at all possible. My husband was removing the filter from the overhead built-in dishwasher when the screwdriver he was using slipped out of his hand crashing down onto the stove. This left a rather nasty looking chip. The chip could have been left as is but would be unsightly. It would get worse over time with likely a bit of rusting. We stopped at Home Depot to buy Porca-fix to fix the chip immediately.
Porca-Fix is one brand of appliance chip repair products. There are others but this formula will only need one application. It is about $5 for the small bottle but most repairs you will only need a drop or two from the built-in applicator. It is rather easy to use with no special skills required.
To use simple clean the chipped area good and be sure it is dry. Then using the applicator dab on a drop or two. If it runs a little wipe the drip with a paper towel. The patch will be raised which is normal. Let the patch dry fully. Once the patch is fully dry it can be fine sanded using the provided sandpaper to give a smooth, barely noticeable repair.

I let the patch dry for about 8 hours then sanded it. The sanding brought the patch down to the same level as the original stove finish. To the touch the patch is not noticeable at all. If you look very close and know what you are looking for you might just barely notice the slight colour difference of the patch depending on the lighting. This is something that cannot be helped given the colour variances in appliance manufacturers. Your best results will be with black or white. There is ivory but what is now called ivory is a lighter version of almond so if your appliance is actually almond then the repair will show a bit more but if done properly should still give good results. At any rate this is an easy way to keep your appliances looking nice if a chip should happen.
If you have been following this blog you will know we installed a high efficiency Bosch SHE44C02UC (more here) dishwasher shortly after moving here. You will also know that energy conservation and energy efficiency is a huge concern to us. I vary between using dissolvable dishwasher tabs (not the individual wrapped kind) and am currently in the process of switching over to using phosphate free Green Earth tabs for use during the hotter, humid months. During the dryer winter months I use a non-phosphate powdered dishwasher detergent. In terms of detergent, the cost is ranging from 9¢ to 29¢ per load. Electricity costs 13¢ per load and that includes the cost of the flow through water heater in the dishwasher. The water is pre-heated by natural gas comes in at about 6¢ per load and water less than 5¢. Total cost to operate the dishwasher per load come out to 33¢ to 53¢ without adding in the cost of the rinse agent. The manufacturer is very specific that a separate rinse agent must be used even if the detergent has a rinse agent included. The reason for this is the dishwasher dries by convection rather than using a heating element. A separate rinse agent ensures proper drying.
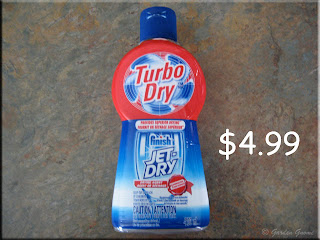 Brand Name Rinse Agent
I started off using a brand name rinse agent (JetDry®) at 7¢ per load then switched to their new TurboDry® formula. A 200 ml bottle cost me $4.99 for 64 loads or 8¢ per load. This brought my total costs to run the dishwasher per load up to 41¢ to 61¢. In the big picture the total cost for the brand name rinse agent worked out to be $16.64 so saving on rinse agent was not going to be a big cost savings but it would still be a savings. Part of being frugal is to never pay more for a product if you can find a less expensive product that gives you the same results.
The biggest problem I had with buying brand name rinse agents aside of the cost was availability. The regular JetDry® was usually available but the TurboDry® was not. Another problem I had was rinse agent is not something I could find on sale.
 Store Brand Rinse Agents
On day I was in NoFrills® and rinse agent was on my grocery list. There wasn't a bottle of JetDry® to be found so I tossed a bottle of their no name® brand into the cart. It was $2.99 for 250 ml. I immediately thought I'm getting 50 ml more for $2 less so as long as it worked the same as JetDry® I knew I would be switching. This would reduce my cost to 4¢ per load, not bad! I filled the rinse agent reservoir then waited to see the results. There was no noticeable difference between JetDry® and the no name brand®! It worked just as the same and it was a made in Canada product.
A few weeks later I discovered rinse agent at our local dollar store. It was 250 ml for $1, made in Canada and phosphate free! So I bought a bottle to try. This brought my rinse agent cost down to 1.3¢ per load so a savings of 6.7¢ per load. The key thing that I liked was the product was phosphate free. Eliminating any phosphates in the products we use is also important. Once again I did a few test runs over the period of one full loading of the rinse agent reservoir. This product performed just as good as the brand name without the phosphates so I went back to do a stock up. There is no expiry date on the rinse agent and unlike powdered detergent it does not lose its effectiveness.
When shopping at a dollar store think of it as a liquidation store. If you find a product that you like that works to your expectations, stock up then. Their stock is determined based on availability and don't forget some of this availability is due to buying up stock from other stores that went under. Once they are sold out a different product will replace that product. So do keep that in mind.
Garden Gnome
©2006-2009


 Brand Name Rinse Agent
 Store Brand Rinse Agents


