What does a Garden Gnome do when she is not gardening, in the kitchen or doing genealogy? Well the answer might just surprise you so read the entries to find out more. This blog focuses on everything we do to make our house a home. There will be a strong emphasis on home energy efficiency and do-it-yourself (DIY) projects. At the same time there will also be crafts, knitting and crocheting projects along with any other little tips we do to create that down to earth, I want to be here home. Please enjoy your visit :)


Friday, July 30, 2010

A Brief House Sale Update

There has been a bit of a change on the house sale situation.  I will go into greater detail likely next week.

Garden Gnome
©2006-2010


Thursday, July 29, 2010

What To Look For When Buying a House

By default with our house up for sale we are house hunting.  When house hunting there a a wide range of features that should be overlooked.  Essentially these are features you can easily change or if it is something tangible like appliances you could always try asking for them in the offer.  This is all part of the dickering process however there are some things we look for in a house that factor into whether or not we consider it further:

  • location - Location is critical. A house out in the country is lovely and because you are a distance from conveniences like fast food restaurants.  Rural living saves a considerable amount of money.  However, if you have school aged children a house in the country can mean you spend a lot of time driving them to various activities.  Urban living may give the possibility of downsizing from two vehicles to one, using public trasit, and walking or biking to work and various activities.
  • good solid construction - This is a must!  If the house is not solid pass it by. 
  • any signs of water damage - A very small amount of water can cause a lot of structural damage.  Water damage can also lead to insect damage from carpenter ants or simple insect infestation.  Some signs of water damage include: water marks, indicator insects (eg. centipedes, pill bugs, earwigs, etc), musty smells, sagging pavement, mold on windows frames or walls, moss/mildew on siding or roof or sink holes.  If you notice any of these signs get a home inspection!
  • pets - Any signs of pets is cause for concern.  Sorry but a vast majority of people are sensitive or allergic to pet dander.  If a pet(s) are in the house then carpet and duct work cleaning will be a must.  This will increase the price by about $500 if not a bit more.  If this is a I love it house then fine but if it is iffy, walk on by.  Keep in mind that allergy/asthma medications can cost upwards of $1.000 per year if more so that does add to the overall cost of home ownership.
  • energy efficiency - This is likely the number one feature to look for is any home you are considering buying.  A well insulated and sealed home is a better investment
  • eco-friendly - The house should have a lot of eco-friendly choices to prevent later problems.  Avoid homes with carpeting, paneling, press board and any other construction product that causes off gassing or later health problems.
  • features you can work with - If something regardless of how little it is rubs you the wrong way when your look at the house I will guarantee you that flaw will seriously become a major thorn if you buy the house.  Look for features you can work with and don't gloss over how much work it could take to use that feature.  Guaranteed if you figure fixing that feature will cost $1,000 it will cost you $3,000 and likely take at least double the time.
  • orientation - The way a house is oriented on the property can affect lighting, heating and cooling.  Orientation will determine if you can use solar as well something to consider with the rising prices of electricity.
  • hide problem materials - Certain products have a good reputation for hiding problems.  They are quick, inexpensive fixes that cover up an existing problem.  These include sheet panelling, tub surround, acoustical ceiling tile, drop ceilings, paintable textured wallpaper, carpeting, and a coat of fresh paint.  Not all of the problems covered are major and in some cases it could be just what the current owner likes but these are always cause for concern.
  • expandability - We've owned 7 houses now with currently owning houses 6 and 7.  One of the things we always look for in a home is garden space and the potential to put in a pool.  We put in pools at 2 of our houses so we know what is involved and since the kids are grown the chances of us putting in a pool is slim but that is one of our criteria.  The backyard must be big enough to put in a pool if we ever want one.  More importantly there must be room for the type of raised bed gardening and the possibility of chickens.   Room inside to add an extra bathroom if there is only one or bedroom/guestroom is another must.
  • a good neighbour fence - Good fences make for good neighbours especially in urban settings.  Nothing can destroy neighbour relations faster than a lot line dispute that quite often occurs when one neighbour wants to errect a fence.  If a fence is already there the issue of fencing becomes non-existent.  If the fence is only chain link which solves issues of wandering pets and children but not privacy, it doesn't take much to establish a living privacy fence around the perimeter
Garden Gnome
©2006-2010


Wednesday, July 28, 2010

What Not to Look for in a House

We are showing the house tonight so I've been doing the old spit & shine.  The main problem with most house sales is you have to live in the house while it is being sold so by default that means you have to do a spit & shine for each showing.  At any rate we decided to not ask for the extension on the conditional offer we had on a house.  It's funny hearing some of the comments of people going through our house and yet these are precisely the things you should not look at when buying a house:

  • decor - Any decor is changeable so ignore things like paint and wallpaper. That is all easily changeable when you move in.
  • furniture - Sorry it really doesn't matter if you like their choice of furniture or not.  I suppose you could always put an offer in that includes a particular piece of furniture but chances are good they will turn you down so just ignore the furniture.
  • clutter - Sorry but a lot of people are not neat freaks.  That means you as the potential buyer need to overlook any clutter.  It will be gone when you move in anyway. 
  • personal effects - This includes virtually anything that may be in the house.  So what if you don't like the way they organized the cupboards or folded the towel.  None of this is staying anyway so just ignore it.

Garden Gnome
©2006-2010


Sunday, July 25, 2010

Plastic in the Freezer

Continuing on my theme of plastics in the kitchen, I wanted to share how I deal with plastics in the freezer.  By far the most used packaging in my freezers (2 chest, 1 refrigerator side) is butcher's wrap.  For safety reasons I prefer not to use glass in my freezers other than the door shelves of the freezer portion of the side-by-side.  At the same time most plasticware and specifically the less expensive plasticware does not prevent freezer burn which leads to food spoilage.  For this reason I very seldom use snap lid types of plastic containers in the freezer.  Occasionally I will use a screw type plastic container in the freezer but only for very short term storage.  I also occasionally use plastic shape forming molds for things like homemade frozen treats.  The majority of plastic use in the freezers is comprised of plastic vacuum sealer bags with a very small minority of zipper style plastic freezer bags.  Zipper style freezer bags are good for a few select foods but in general I prefer vacuum sealer bags.  Vacuum sealer bags are heavy duty bags with a channel that when used with a vacuum sealer removes air surrounding the food from the bag then heat seals the bag.  Foods sealed this way have an extended freezer life and freezer burn is virtually eliminated. 

Garden Gnome
©2006-2010


Saturday, July 24, 2010

The Plastic Rules

Everyone has a different way of dealing with plastics in their kitchen.  We have been striving to greatly reduce plastics coming into our kitchen.  Like many I have come to the conclusion that trying to eliminate plastics in the kitchen is virtually impossible. I have the following rules regarding plastic that finds its way into my kitchen:

  • if the product comes packaged more than one ways, jars will always win over plastic
  • plastic does not go in the dishwasher
  • plastic does not go in the microwave ovne
  • plastic is always hand washed without exposing to hard environment
  • any disposable plastic is recycled if at all possible

Garden Gnome
©2006-2010


Friday, July 23, 2010

Continuing on the Theme of Reducing Plastics in the Kitchen

Continuing on the them of reducing plastics in the kitchen it really is interesting to do an inventory of anything plastic in the kitchen.  The problem with plastic is it is everywhere from large and small appliance components to utensils, serving dishes, handles, dish soaps and even kitchen decor.  It is everywhere!  Realizing this makes it easier to deal with plastics that come into the kitchen.  In some instances you can eliminate or reduce certain plastics in your kitchen.  In other cases plastics are desirable due to the safety aspect of plastic not breaking like glass.  In many cases though you have no choice because the plastic is part of the appliance or that is how it is packaged (eg. dishsoap, some dairy products).  So the plastic does come into the house.  The way to deal with this is reduce what you buy and recycle what plastics you can.

I am most concerned about plastics that come into direct contact with foods.  That includes utensils, food storage containers, dishware, serving bowls and that type of thing.  When it comes to these types of things plastic does have its place.  In fact plastic can be better than metal or glass for some of these application.  Here is my hit list for avoidable plastics in the kitchen.  :

  • disposable anything - This includes: cups, cutlery, disposable plates/bowls, plastic wrap, food containers, spice/seasoning bottles, and water/juice/soda bottles.
  • individually wrapped anything -  This includes things like condiment packages, snack foods, drinks, frozen treats and that type of thing.
  • excessively wrapped anything - I prefer buying the least amount of plastic packaging possible.  Excess plastic packaging adds to the cost of the product and often ends up in the landfill because it can't go in the recycle bin.
  • non-recyclable plastics - If I can't put the plastic into the recycle bin I try very hard not to bring it into the house. 
It can be difficult to eliminate these plastics entirely so the goal is to reduce and use the least amount possible.  It is a continual battle and sometimes it becomes a compromise.  If you pick up a deli roasted chicken that is cheaper than raw and eliminates cooking on a hot, humid summer day but the chicken comes in a plastic container it may be that the chicken is the more eco-friendly choice.  Quite often take-out or delivered food includes things like disposable cutlery so I usually tell them I don't want it but on the rare occasion we go through a drive through restaurant any extra plastic cutlery or individually packaged cutlery are saved.  In this case I feel it is better to use/recycle these items rather than just tossing. 

Garden Gnome
©2006-2010


Thursday, July 22, 2010

Unavoidable Plastic Food Packaging in the Kitchen

In an effort to reduce the amount of plastic used in the kitchen I have eliminated or reduced certain types of food storage containers.  This is a conscious decision one in which we can choose whether or not to use plastic.  The problem with plastic is that it is virtually impossible to avoid in the grocery store.  As manufactures strive to cut their cost of production and transporting the product they are turning to plastic.  The reasons for this include:

  • plastic is cheaper than glass or cans
  • plastic is more durable than glass, removes risk of breakage
  • plastic is lighter weight than glass or cans
Plastic is continuously coming into our homes whether or not we like it usually though the foods we buy.  Reducing what comes in via this method is possible and some plastic food packaging can be recycled.  Some of the sources of plastic in food packaging is quite obvious while in other cases it is not quite so obvious.  The important thing to note is that in the following cases the plastic is in direct contact with the food:
  • plastic wrap - Fresh meats, poultry, cured meats, lunch meats and cheeses are usually wrapped in some type of plastic packaging.  Compounding the problem is fresh meats often come on styrofoam trays wrapped in thin plastic wrap.   Ideally the plastic packaging has been vacuum sealed to keep the product fresh longer but that is not always the case.  Plastic wrap can be avoided in fresh meats and poultry by buying directly from the farmer or from a butcher shop.  It is possible to buy cheeses at a cheese factory that have not been wrapped in plastic but even there a large number of cheeses are wrapped in plastic.  Cured meats can be made at home or bought at a butcher shop to avoid plastic wrap.  Lunch meats can be eliminated entirely by slicing leftover roast, turkey breast, ham or meatloaf to use instead.  Another problem is buying at stores like Sam's Club quite often a food item is in a plastic container then 2 or more of these containers plastic wrapped together or things like canned tuna are shrink plastic wrapped together.  True you get the savings but you also get the plastic.
  • plastic clam shell containers -  Berries, some fruits, bean sprouts and some vegetables are often packaged in plastic clam shell containers.  Avoiding these horrid containers is easy by buying from the loose produce section, shopping the U-picks or farm markets and sprouting your own beans.
  • plastic tubs - Yogurt, sour cream, soft cream cheese, cottage cheese, ricotta cheese, feta cheese, dips, deli foods (salads, etc.)  and ice cream all come packaged in plastic tubs.  Yogurt, sour cream and ricotta cheese are easily made at home and homemade is less expensive.  The only way to avoid the other products is to not use them.  For most people that is not an option.  Dried foods (eg. nuts, snacks, Parmesan cheese) in the bulk section of the grocery store are often packaged in plastic tubs.  However many of these products are also available in other containers like plastic pouches or cardboard containers so that is always an option.  If you shop at a bulk food store, foods like peanut butter, honey and pie filling are spooned into plastic tubs.  Here the only option is to not buy them but rather make your own pie filling and peanut butter.  Buy honey from a beekeeper where you can bring your own glass container.
  • plastic food bags - Thin plastic bags are available for produce in the grocery stores.  It is advisable to use these to prevent cross contamination of other food products and to prevent further contamination from surfaces like the conveyor belt at the check-out.  Many bakery (eg. breads, rolls, etc.) products are packaged in plastic bags.  These can be avoided by making your own bakery products.  If you shop in bulk food stores for dry foods like herbs, spices, flours and etc the only choice is to use their plastic bags to get your food home.  You can't use your own containers as they presents a health and safety as well as liability issue for the store.
  • plastic bottles - Most condiments come packaged in the popular plastic squeeze bottles.  However some are also available in glass jars so that is an option.   Another option is to make your own condiments at home.  Relish, ketchup and mustards are very easy to make at home and they are less expensive.   Juices and water also come in plastic bottles.  Buy a reusable water bottle and fill at home to eliminate buying pricey water in plastic bottles.  Eliminate the plastic bottle for juices by buying frozen juices and making them at home.  Frozen juices tend to be cheaper as well.
  • plastic pouches - Spices, dried herbs, nuts, baking supplies like chocolate chips all come packaged in plastic pouches.  Buy from a bulk food store instead where you will still use thin plastic bags but those bags can be recycled whereas the pouches can't.  Some fast food restaurants and sidewalk carts have condiments packaged in individual serving sized plastic pouches.  Avoid these entirely.
  • cans -  Many are under the mistaken impression that getting foods packaged in aluminum cans solves the plastic issue.  It doesn't and in many ways foods packaged in aluminum cans are worse because of the potential health risks.  Every food and beverage can used in North America has a plastic lining to prevent interaction with the food.  This is a FDA mandatory requirement.  The coating may be white so it is visible or it may be clear giving the impression there is no lining but it is there.  The problem with this plastic coating is it does cont Bis-phenol A (BPA) which means the food contains BPA due to the nature of the canning industry.  Heat and acidic conditions causes BPA to leach from the plastic.  Both of these conditions occur during the canning process.  Avoid buying any food or beverage packaged in a can and that includes carbonated beverages and beer.
  • glass jars - The BPA issue cannot be avoided by buying in glass jars or home canning as all metal lids also have the plastic coating containing BPA.  However, buying in glass or home canning greatly reduces food exposure to BPA.  It is very important when home canning to not invert the jar allowing the hot food to come into contact with the lid.  Once the food is cooled for both commercially jarred or home canned food the risk of BPA leaching into the food is gone.
Garden Gnome
©2006-2010


Wednesday, July 21, 2010

Plastic Food Container Dilemna

A couple of days ago I posted about the new plastic food storage containers I bought.  Plastic in the kitchen presents a real dilemna.  Over the past couple of years I have been working to eliminate as much plastic as possible in the kitchen especially for food storage however this is actually a bit more challenging than it appears.  There is no doubt that food storage is a necessary aspect of any kitchen.  While a variety of wraps and bags are available these are not eco-friendly or frugal choices.  Food storage ranges from dry to refrigerator to freezer so containers used must be flexible.  Tupperware® was all the rage years ago when were newlyweds but it was something I never did get into.  I only have 4 pieces of this higher end plastic food storage/serving containers, two of which are the old harvest gold which gives their age away.  Several years ago I eliminated plastic wrap and food storage bags other than for freezer use in favour of inexpensive, disposable containers (eg. GladWare, Ziploc).  The problems with these containers is:

  • they do break when frozen
  • they create an incredible amount of clutter
  • lids go missing
  • they end up adding to landfills
  • snap on lids can come loose and leak
However, they are inexpensive so are perfect for gift giving and I don't mind if they go missing.  When I decided to eliminate more plastic from the kitchen these were my first targets.  Years ago I bought glass baking dishes that came with plastic lids.  The lids have stood the test of time so I looked for storage ones that would go from freezer to oven.  Canadian Tire puts sets of Anchor Hocking glass bakeware on sale so I bought 3 sets to be used for food storage in the refrigerator and baking in the oven.  Still the lids are plastic which really is a trade-off but are better than plastic wrap or disposable containers.  At some point plastic food storage containers are necessary for freezer use especially since I don't like using glass in my freezers and for use in the boat, picnic, and dock/pool areas where glass breakage has the potential for personal injury.  I have revised my use of plastic in the kitchen from eliminating entirely to minimizing.  My requirements for kitchen plastics are:
  • BPA free
  • heavy duty, not disposable
  • spill free plastic containers - screw-on or locking type lids
  • lids on glassware are heavy duty, sealing securely
Garden Gnome
©2006-2010


Tuesday, July 20, 2010

House Sale Update

Selling a house often includes a lot of decision making even during the sale process. Our house has been on the market since March, first privately then followed by using a real estate. When we put the house up for sale we had just bought a vacation home so downsizing a bit seemed logical.  As we talked about it more we realized that moving from our rural, waterfront property would greatly reduce the amount of driving.  We found a house, put a conditional offer in and it was accepted.  Since then the market has softened in our area so we reduced the price of the house.  The HST came into effect which is affecting house sales in Ontario as now the associated fees of selling a house have an additional 8% tax on them.  We had to extend our conditional offer.  In the meantime the market softened a bit more.  The extension on the conditional offer expired but that worked out to our benefit.  A home inspection had been done on the home by another potential buyer.  Apparently some major water issues were found so it is a good thing we didn't ask for another extension since a home inspection was not part of our conditions.  Over the past weekend we did a lot of talking about the pros and cons of moving into town verses staying where we are.

The general consensus is moving into town is the frugal decision.  It would eliminate my husband's daily commute to the office.  We would be able to walk or bike to get groceries and other necessities.  It would not eliminate my food runs to various farms and farm markets but staying here wouldn't eliminate those either.  It would eliminate our gorgeous view of the water but we still have the boat to enjoy the water during the nice weather.  So we have both come to the conclusion that we do want to move.  We reduced the price of our house again but have already decided that will be the final reduction.  If the house doesn't sell at that price we will take it off the market next month.  In the meantime we are back to house hunting. 

Garden Gnome
©2006-2010


Monday, July 19, 2010

Food Storage Containers

rubbermaid lock-its

Rubbermaid® Lock-its

Quite some time ago we started on our quest to rid our kitchen of as much plastic as possible.  The main reason was I felt that going to glass containers for food storage was a better eco-friendly choice and for the most part they are.  The lids are plastic but other than that I am quite happy with the performance.  Over the past year I have worked at getting rid of plastic food storage containers mainly because they were old, stained and many were missing lids.  I quickly found though that plastic storage containers are better suited than glass for some uses especially on the boat. 

My dilemna was I did not want to buy the cheaper disposable plasticware like Ziploc® containers because quite frankly I've been down that road.  Essentially I was looking for better quality for the few pieces I wanted.  I wanted plasticware that was BPA free even though I don't use plasticware in the microwave oven and seldom put it into the dishwasher.  I wanted something sturdy enough to be leak proof and live up to regular travel.  I tried out 2 pieces of the Rubbermaid® Lock-its for a couple of months.  I liked how they performed so this weekend bought a 12 piece set.  These are perfect for taking on the boat where glass food storage containers pose the higher risk of breakage.  I want to pick up a couple of the larger ones our next shopping trip to the US as I haven't found these containers on the Canadian side.  That along with 5 screw top Ziploc containers comprise my plasticware food storage used mainly for travel purposes.  It's not a lot especially when compared to the plasticware of others.  They don't take up much room, stack nicely by snapping together and basically fit a specific need.  The down side is I will not be readily willing to part with these storage containers like I would the disposabale ones but that's ok. 

Garden Gnome
©2006-2010


Sunday, July 18, 2010

The Dishwasher Fallacy

I recently reported on a newly purchased piece of Nami coated bakeware that really looks promising.  It was a spur of the moment purchase so I did not do any research on this silicone based coated software. When I did the only complaint I found was the bakeware was not dishwasher safe.  I honestly don't understand this kind of complaint.  The bakeware is designed to be non-stick so by default should take minimal washing to clean-up.  It doesn't need to be washed in the dishwasher!  In fact in my test runs with this particular bakeware it doesn't even need soaking but rather just a simple wash that would take less than 2 minutes.  I have all kinds of non-stick bakeware, non-coated bakeware, pot and pans, baking utensils and a wide range of entertainment and kitchen ware that never sees the inside of a dishwasher.  My prep knives are always hand washed as well.  So the only complaint agaists a piece of non-stict bakeware is it isn't dishwasher safe?

Let's think about this.  I've had a dishwasher since the kids were quite small and now they are adults with kids of their own.  I still have a dishwasher.  Over the years I have heard of people using their dishwasher for washing ball caps and even cooking food.  I recently posted how  jar labels can gunk up your dishwasher and yet everyone has this misplaced fallacy that everything must be dishwasher safe.  I'm sorry but I don't buy that.  Certain kitchen items are simply meant to be hand washed.  It takes very little effort to load the dishwasher then wash up the remaining items that should not go into the dishwasher.  Don't fall into the dishwasher fallacy that everything thas to be dishwasher safe.  It doesn't and despite that the item can function quite nicely in the kitchen. 

Garden Gnome
©2006-2010


Saturday, July 17, 2010

We Have Wasps

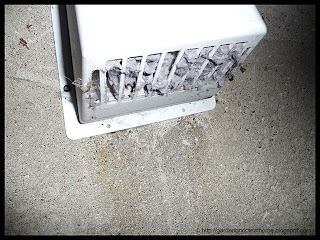
A few mornings ago I'm sitting at the computer when I hear a loud buzzing noise.  It took me a few minutes to figure out it was coming from the laundry room so I investigated.  In between the window pane and screen there was a wasp making a fair amount of noise.  A couple of days later I heard the noise again so went to check and look what I discovered!


Somehow the window screen has been pushed out at the bottom allowing access for the wasps.  The first step will be to push the screen back in tightly.  Once we are sure there is no further activity we will remove the nest and replace the screen tightly in place.  This method should solve the problem without resorting to any chemical control.

Garden Gnome
©2006-2010


Thursday, July 15, 2010

Reusable and Cloth Shopping Bag Danger

Many eco-friendly shoppers have turned to using reusable and cloth shopping bags.  Apparently it has come to light that these bags can present a cross contamination and bacterial build-up danger.  The reason is the bags can get moisture via damp produce and condensation from refrigerator products.   Factor in the fact many keep the bags in their vehicle so they may also be exposed to high humidity conditions when the vehicle is not in use depending on your location.  All grocery products whether wrapped or not have been exposed to several levels of human contact.  In addition to that canned and boxed foods may have been exposed to rodents during their time in warehouse storage.  The problem with all of this it the bacterial level on various food items can cause bacterial buildup in the bags.  As each bag is reused there is the potential to contaminate other foods carried home in the bags.  To prevent these potential problems:

  • Use those very thin produce bags for your produce in the produce section.  They can be washed and reused several times unless they develop a hole.  They can also be put into the recycle bin at home or at your grocery store if they offer bag recycling.  Alternately use a dedicated cloth bag or two for unbagged produce only and wash after each use.
  • Wash cloth bags after using them for groceries.  They can go through the washer in the cold setting and hung to dry.
  • Spray the insides of polyethene bags with rubbing alcohol after each use.  The rubbing alcohol will kill off any germs left behind and evapourate quickly so as to not leave the bag wet.
  • Leave your clean shopping bags near the main exit door or by your keys rather than in your vehicle.

Garden Gnome
©2006-2010


Wednesday, July 14, 2010

Homemade Solution for Extending Life of Cut Flowers

This is the time of year that it's nice to bring in a few flowers from the garden to enjoy.  Extend the life of those flowers by mixing together:

  • 1 tsp sugar - provides nutrition to the flowers
  • ½ tsp lemon juice - acid helps to increase water absorption
  • 1 drop of chlorine bleach - prevents bacterial growth and extends life of flowers
  • 1 quart room temperature water
Pour the mixture into vase.  Add the fresh cut flowers and arrange as desired.

Garden Gnome
©2006-2010


Tuesday, July 13, 2010

Dealing With a BUD (Big Ugly Dish)

painted satellite dish
Painted BUD
July 10, 2010

We installed a 10 foot satellite dish affectionately known as a BUD short form for Big Ugly Dish.  These types of dishes were all the rage for quite awhile as they allowed those in rural areas to get rather decent television service where they couldn't via any other method.  We installed it because quite frankly the service was less than half the price of cable with a lot more channels.  In fact for a few years it was actually free via free-to-air.  Our satellite dish was one of the fancier black mesh dishes so it was not as obvious as the solid beige dishes but it was still a BUB! 

It is really difficult to camouflage a BUD because anything that blocks the dish itself actually blocks your satellite signal.  So while the BUD gives a lot of great entertainment it really is an eyesore.  The next house we moved to had a BUD, one of the ugly solid beige ones.  We had brought our black mesh one with us which was a lot more work than you would think.  We sold the black mesh one, left the beige one where it was because that would have been a huge pain to take down, and installed one of the smaller satellite dishes.  Like many we simply just left the beige BUD were it was.  These huge ugly dishes continue to in many ways pollute the skyline.  There was one here when we bought the house.  We took it down.  There is one at the neighbouring house to the house we have the conditional offer on.  They are hard to get rid of so in many ways leaving them where they are seems to be the resolution.

I've seen some rather interesting uses for old BUDs.  Golf courses use them on the driving range.  Some enterprising people have sealed or the solid BUDs or used them under pond liners to make shallow garden ponds.  Others have done as this person did, paint them up to add a bit of whimsy.  If painting you will need a tall ladder as most BUDs are 10 foot diameter and raised above the ground by at least 8 feet.  The BUD should be pressure washed first then allowed to fully dry.  Use a good quality latex outdoor paint to do the design.  If the design is complicated you will likely have to mask of certain areas.  Use a good quality paint tape.  Remove the pains as soon as possible to prevent the sun from setting the adhesive.

Garden Gnome
©2006-2010


Monday, July 12, 2010

Installing a Wall Anchor

Dry wall, plaster and other wall coverings like panelling often cannot hold the weight of objects you want to hang.  Wall anchors are often necessary when hanging heavy pictures or other objects on walls.  This is especially important if you cannot hit a stud where you want the object to hang.  The purpose of a wall anchor is to spread the weight of the object while securing the screw to hang the object on.

installing wall anchor
A wall anchor can be metal or plastic and they come in various sizes to fit different sized screws.  I wanted to hang a wall mirror and while it wasn't particularly heavy I needed a secured screw that wouldn't give.  The mirror was a gift from our kids so I didn't want to take any chances.  After marking the location where I wanted the mirror I used a plastic wall anchor.

A pilot hole needed to be drilled to fit the the anchor.  I chose a drill bit a little narrower than the anchor to drill the hole.  Then I gently tapped the anchor into the hole just to the lip of the anchor (1).  Once the anchor was in place I screwed in the screw that the mirror would hang from leaving about an eighth inch sticking out from the wall.  Then I hung the mirror. 

wall anchor in use
Once the object is hung it will cover any little flaws from installing the wall anchor.  These flaws can be greatly reduced or eliminated if you go slow and take your time.  After marking where you want the hole drilled place a piece of masking tape over the mark.  The mark will show through the tape.  Slowly drill through the mark with the drill while holding the drill level.  This will prevent cracking.  Carefully pull off the tape after the hole is drilled.  Cover the head of your hammer with a cloth then gently tap the wall anchor into place.  This will prevent any marks on the wall. 

The mirror looks lovely in it's new location.  I know it is securely hung and can actually say it did go through an earthquake!  An 5.0 earthquake hit Quebec on June 23, 2010 at 1:41 pm with tremors felt throughout most of Ontario and into some US states.  Our house did shake but we suffered no damage.  It was a rather scary feeling though!

Garden Gnome
©2006-2010


Sunday, July 11, 2010

Third Experiment Using SoilMoist™ for Craft Project

I posted earlier about using SoilMoist™ granules for craft projects.  This product is meant for use as a water management system for houseplants and outdoor potted plants.  However it has the potential to be used as a craft product for making interesting centerpieces, room fresheners and so much more.  I did two experiments with the granules to see how they would perform.  The granules took the food colouring well so that opens up being able to create custom colours to fit your decor.  I also tested to see how well the granules would absorb then release a scent like vanilla.  They hold and release the scent well again increasing the possibilities for a craft project.

Once I found that the SoilMoist™would take up food colouring and scent, I was interested in finding out whether the granules could have the colour and scent removed so they could be used in other craft projects.  I started with  granules that had been dyed blue with blue food colouring and scented with 100% pure white vanilla (1).  I poured the granules into a strainer then poured water over them to cover (2).  Once the water took on a good colour I poured it outside not down the drain just in case there were any small pieces of the granules in the water that could cause problems in the drain.  After three water changes the granules had lost most of their colour (3) and after the fourth water change the granules were back to crystal clear.  This means that I can now reuse those granules for other craft projects!  In order for this to work the dye and the scent must be water soluble but that still opens up a lot of possibilities.  I can see using herbal infusions such as lavender, mint and lemon balm for scent and with a bit of inexpensive food colouring the colour possibilities are endless!

Garden Gnome
©2006-2010


Saturday, July 10, 2010

Blocked Dryer Vent

blocked dryer vent
Blocked Dryer Vent
July 3, 2010

Well before Hydro One announced they were moving to a Time of Use (TOU) pricing for electricity rates my preferred time to do laundry was in the evening or on the weekends.  This just worked into our schedules nicely and especially when the kids were younger ensured all the dirty clothes from the day ended up in the wash when I was doing it.  Even with my high energy efficient washer and dryer I still prefer to do laundry in the evening.  It's convenient because I can fold clothes curing commercials.  To go along with our HE washer and dryer we installed a Braun Eco-Vent in November of 2008.  Up until this point we have had no problems with the vent.

A few nights ago I ran a load of laundry as normal but noticed that the clothes failed to dry in the required amount of time.  Upon further investigation I discovered the outside portion of the vent was clogged.  This is the first time the vent has clogged on us.  I'm very careful to make sure that the dryer lint trap is cleaned after every use so this has become quite the mystery.  The only thing I can think of is we had quite a wet spring and recently experienced a week long heat wave with high humidity levels.  Combined with hot, wet air coming from the vent itself this resulted in a prolonged wet surface for lint to become clogged.  It's the only thing I can think of that would have caused a problem given that after 19 months the vent suddenly became clogged yet we had experienced no problems prior to that.

Despite being after 11 PM and needing a flashlight I quickly unclogged the vent which given the design is not quite as easy as it sounds.  I ended up using a serrated steak knife to pull the lint from the vent cover as the grate does not come off.  One tug was all it took to feel hot air blowing from the vent and that only cleared one opening.  I continued clearing all of the openings and checked the ball valve to be sure it was operating properly.  Once this was done the clothes were dried within minutes.  Now I know this is a potential problem since a blocked vent especially for a gas dryer can cause carbon monoxide to get into the house as well as creating a fire hazard, I will be checking the vent on a more regular basis.  To be on the safe side my husband removed the hose to be sure there was no lint build-up.  Thankfully the problem seems to have been vent related only but it certainly is something to keep an eye on. 

Garden Gnome
©2006-2010


Friday, July 9, 2010

Cleaning Out the Blocked Number List

Early last November I posted about our new phone system that freed us from using all but caller ID through our phone service.  Essentially this has saved us about $30 per month since we got the phone.  We have been extremely pleased with it's performance.  The only problem we've had is somehow accidently erasing the phonebook but that was easily fixed.  This phone holds up to 30 blocked numbers which is a real handy feature for avoiding telemarketers. 

The problem with telemarketers is they keep changing their phone numbers so as soon as you have one blocked they use another number.  If 3 telemarketers each have 5 lines they can use there's half of the allowed numbers to block by this phone.  The sad part about this is if you sign up to Canada's National Do Not Call Registry the calls actually increase as fines for calling are not enforced.  One of the worst things we did was put our phone number on that registry!

Today I found myself with the blocked numbers list full after getting 2 telemarketer calls so that meant it was time to clean out the list.  In the ideal world you could just empty it and start again but that doesn't help for the persistent telemarketers.  What I did was list the numbers then run each through Google.  Each number will come up in the search results usually with entries on 800notes.com or whocallsme.com.  Checking the numbers I found 2 that are now being reported as no longer is service and 3 iffy ones.  The US just did a huge crack down on telemarketers calling both the US and Canada so another 4 are quite questionable.  For now I'll delete the 2 confirmed dead and 3 iffy ones.  That will give me time to see if the other 4 are dead as well.  With any luck as the list fills up again I can start deleting from the oldest entries that hopefully discouraged by their unsuccessful attempts at calling us have moved on to greener pastures.

Garden Gnome
©2006-2010


Thursday, July 8, 2010

Taking the Power Pledge

image courtesy of: Ontario Power AuthorityOM and WWF-Canada

I check HydroOne's website on a fairly regular basis looking for new ways to conserve electricity as well as new incentive programs.  They have online tools to help you become more aware of your energy usage like the PowerSaver Pluse Energy Audit Tool and the Appliance Calculator.  Yesterday I checked their site and noticed the Power Pledge incentive for energy conservation so I decided to take the pledge.  There are six simple questions that when clicked to expand there are check boxes to choose the ones most suitable for your electricity usage.  As an incentive for taking the pledge you 20 FREE AIR MILES® reward miles and another 10 AIR MILES® reward miles is donated to the participating charity of your choice.

Garden Gnome
©2006-2010


Wednesday, July 7, 2010

peaksaver® Program in Action

I posted in may that we enrolled in Hydro One's voluntary electricity Demand Response peaksaver® program.  This program is designed to ease critical strain on the electricity system in Ontario on hot summer weekdays.  Once enrolled in the peaksaver® program, a new programmable thermostat with a special chip will be installed at your residence.  Hydro One can remotely turned up the central air by two degrees Celsius.  The central air unit is turned off remotely for 15 minutes, once per 1 hour period up to a maximum of 4 hours.  At most this may raise the room temperature a couple of degrees but because the fan continues to run in most cases there won't be a noticeable difference in room temperature.  The peaksaver® program can only be activated on weekdays from May 1 to September 30 typically between 2 p.m. and 6 p.m. for a maximum of four hours. The program cannot be activated more than ten times in a year and yet 2008 had 5 activations and 2009 only had 1 activation.

The lower level of our house is mainly below grade.  Combined with our waterfront location that serves to cool the air, we only use the air conditioner on very hot, humid days.  We are currently experiencing a heat wave in Ontario that is predicted to last through next Friday.  Yesterday my husband asked why it was getting warm in the house.  I hadn't noticed any temperature change so figured it must be from the way the sun was hitting the lower windows.  A few minutes later he made the comment that the furnace fan hadn't turned off so it must be quite warm out for the air conditioner to cycle that long.  Upon checking the thermostat he saw that it was in the recovery phase of the peaksaver® cycle.  What we didn't realize is when the peaksaver® cycle is triggered out thermostat fan setting of auto is remotely changed to on to keep the already cooled air circulating through the house.  I found it quite interesting that we had not even noticed the peaksaver® cycle activation until it had almost fully run the cycle.  The nice thing is yesterday we saved a bit of money while doing our part to help conserve electricity without it really having an effect on our comfort level.  I am quite impressed! I'm sure the peaksaver® cycle will be triggered again today with this heat so I will be watching for it. 


Garden Gnome
©2006-2010


Tuesday, July 6, 2010

Jar Labels and the Dishwasher

Many of the jars and bottles that food come in have labels on them.  A frugal homemaker keeps these jars to be refilled as needed.  One of the problems with recycling these jars and bottles is precisely that label.  Many will pop the jar or bottle into the dishwasher knowing that the heat of the water will easily remove the label but this presents two problems.  First the label itself is usually made of paper so breaks down to clog the dishwasher arms and redeposit on other dishes.  The second problem and one many don't think of is the glue holding the label on the jar ends up gunking up seals, gaskets and other parts of your dishwasher.  This can create numerous problems that may result in a repair bill if done often enough.

The best way to remove jar labels is to soak them in hot water then pull or scrape off the label.  Pat the jar dry then rub off any remaining glue residue with vegetable oil or Goo Gone®.  Wash the jar again and it is ready to use.  This keeps any glue residue from getting into your dishwasher where it can accumulate causing problems later.

Garden Gnome
©2006-2010


Monday, July 5, 2010

Cleaning a Dishwasher

The average home cook will run the dishwasher at least 5 times per week.  If you think about it most dishwashers use water, detergent and rinse agent so why would they need to be cleaned?  Most dishwashers have some type of filtering system.  These filters need to be cleaned from time to time.  Water deposits can build up in dishwashers reducing their cleaning potential.  This is especially problematic for those with hard water.  If the inside of the dishwasher is not stainless steel there may be staining from some foods as well.  All in all the inside of the dishwasher does require regular cleaning.  What is the best way to clean the inside of a dishwasher?

  • filters - Remove all filters and clean them under a spray nozzle or running water until they are clean.  Check where the filters go to be sure the area is clean before replacing the filters.
  • blockages -  Certain things like labels on jars will gum up and blog the holes of the dishwasher sprayer arms.  Manually remove any blockages.  In future do not put any jars with labels still on them into the dishwasher.  Don't put thing in your dishwasher that don't belong there and that includes things like ball caps and aluminum foil products as fiber from cloth as well as aluminum breaking down can cause blockages and/or discolourations. 
  • deposits - Hard water deposits can clog water lines, sprayer arms and leave spotting in the dishwasher.  Clear the deposits by using a package of lemon Kool-Aid or 2 tbsp citric acid or 1 c white vinegar in the dishwasher then run a full cycle to clean out the deposits.  If your water is hard and you don't have a water softener then do this cleaning at least once a month.
  • stains - Certain foods especially tomato based foods will stain the interior of plastic lined dishwashers.  The immediate reaction is to use bleach to get rid of the stains.  Do not use chlorine bleach in your dishwasher!  Bleach will damage rubber valves in the dishwasher causing more problems and repairs.  Bleach can cause the gasket around the door that prevents water from leaking out to deteriorate.  Stains can be removed using citric acid and they will naturally diminish over a few dishwasher cycles so just leave them alone.  A Mr. Clean Magic eraser will help manually remove stains from the dishwasher as well.
Garden Gnome
©2006-2010


Sunday, July 4, 2010

The Dishwasher Detergent Dilemna

Shortly after moving here we installed a Bosch dishwasher.  The drying action of this dishwasher demands a rinse agent so for awhile that had me scrambling to find a low cost rinse agent but I finally found one.  Finding a good dishwasher detergent has been a horse of another colour.  We live in a an area where high humidity is common during the summer months.  Powdered detergent has the problem of clumping under humid conditions.  The dishwasher tabs have the ecological problem of being the highest in phosphate concentration and while they do an excellent job of cleaning the dishes, they leave a stringy plastic residue in the dishwasher.  The eco-friendly dishwasher tabs did not clean the dishes as well and they still left that residue.  The off brand gel dishwasher detergent was cheaper but ended up leaving some of the dishes dirty on a fairly regular basis.  So I'm back to looking for a dishwasher detergent that works.

Finish dishwasher detergent
I decided to pick up a bottle of Finish® dishwasher detergent when doing our recent grocery shopping.  A 1.6L bottle cost $3.49 so as dishwasher detergent goes the price was quite good.  What I did not notice when I bought this dishwasher detergent is it is phosphate free!  Now this is excellent and how I missed that little detail is beyond me because that is the kind of thing I always look for.  So here is a product that is not only inexpensive but also eco-friendly.  This dishwasher detergent is alco recommended by the leading dishwasher brands including Bosch.  I've used it twice now and so far I really like the performance but I've learned from past experience that a dishwasher detergent can perform nicely for a few washes then for some reason fails to perform properly.  I'm not sure why this happens only that it does happen.  At any rate so far this dishwasher detergent does look promising so I am keeping my fingers crossed.  Once I've gone through the entire bottle I'll report back as to the overall performance.

Garden Gnome
©2006-2010


Saturday, July 3, 2010

Replacing a New Light Fixture

On March 30 I posted about replacing the light fixture over my desk.  It was an easy DIY project.  The beveled fixture was aesthetically appealing perfect for adding a bit of pizzaz while trying to sell the house.  Despite the fact that the fixture used 25 W specialty bulb at a cost of $3.99 for 4 we went ahead and installed it.  The layout of the house means lights are on most of the time on the lower level that is the main living area and mostly underground.  The first week we went through 4 of the bulbs.  Thinking it was just a fluke we bought more bulbs and replaced the burnt out bulbs.  We replace bulbs again before going on vacation mid-May and again in June.  Finally I had enough!  First we were spending more in kWh just to have this light on but the price of replacing bulbs every other week was getting rediculous!

new CFL fixture
A couple of days ago we picked up an eco-friendly light fixture to replace the fixture we had installed in March.  We opted for a more utilitarian fixture that would hold CFL bulbs.  We put two 14W CFL bulbs  for a total of  28W compared to the 100 W of the other fixture so we are saving at least 72W when the light is on.  The reality is had we not replace this fixture in the first place for resale value we would have put an energy efficient fixture in instead of a fluff fixture.

I love the new fixture! It is energy efficient, low cost to operate and has an excellent light output.  The two CFL bulbs put out the same light as two 60W bulbs.  It's nice and bright without costing a lot of money to turn on and I fully expect to get a good 5 years worth of use out of the CFL bulbs in comparison to the under 2 weeks for the 25W designer bulbs.

Garden Gnome
©2006-2010


Friday, July 2, 2010

Nami Coated Glass Bakeware

On our last grocery shopping trip my husband noticed non-stick glass bakeware in the sundry aisle.  We have been eliminating as much plastic as possible in the kitchen in favour of glass.  We have a fair amount of glass bakeware but another piece is always welcomed.  We decided to buy a piece of this new non-stick glass bakeware to try it out.  If we like it there are a couple of nice sizes that would be perfect when baking for two.

nami coated glass bakeware
This glass 9" x 14" baking dish has Nami silicone non-stick coating giving the non-stick capabilities of silicone bakeware with the sturdiness and rigidity of glass bakeware.  It is made of borosilicate glass that provides excellent heat distribution, durability and resistance to extreme temperature changes.  Metal utensils should be avoided with this coating as affect the appearance of the dish but will not impact the performace of the Nami coating.  The coating may absorb colours from certain foods and some discolouration is likely to occur but will not affect performance or flavour.  The baking dish should be hand washed only with warm, soapy water.

I could not find a lot of information on the Nami silicone-based coating.  The coating is PTFE-free and PFOA-free.  It is an environmentally safe, anti-bacterial and eco- friendly alternative to Teflon® non-stick coating.  The coating is FDA approved.  The coating gives the glass a frosted appearance.   I think this will be the best of non-stick in that there is the convenience of silicone without having to use a second pan.  I will post an update on how I like the performance of this baking dish after using it a few time.

Garden Gnome
©2006-2012


Thursday, July 1, 2010

Happy Canada Day!

Happy Canada Day


Garden Gnome
©2006-2010