Every blogger wants his or her blog to stand out from the crowd. This means stepping away from the generic blog templates that get you started. A couple of weeks ago I was surfing blogs and noticed a few scrolling type blog designs made by The Cutest Blog on the Block. The many designs were indeed cute and placing the backgrounds on the blog involved only the of a simple script. Adding the background in this method meant you would not lose any of your sidebar information which was a real plus. However, I saw two immediate problems for me. First I wanted to create and use my own designs and second by using one of their designs the script pointed to their Photobucket Album which meant if they closed that album the background would immediately disappear. So I wanted control of where the background was. With all this in mind I set about making new backgrounds for my blogs with the exception of my cooking blog that is using one of their designs temporarily [now my own © design].
I'm always looking for ways to use Photoshop® so as soon as I saw their backgrounds, I knew I could easily make my own. Making your own scrolling background and customized headers are easily done using Photoshop®, Photoshop Elements® or Paint Shop Pro®. This technique can also be used to create custom made backgrounds and elements for digital scrapbooking. I'm going to give you the basics of what I did so you can see how easy it is along with the script needed to install the background in Blogger. Their instructions said you set your template to Minima but I got my backgrounds to work using Rounders 2. Background
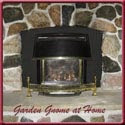
Note: This background is © Garden Gnome and is for illustration purposes only. Please do not copy.
The first thing I did was to determine the necessary sizes by opening one of their backgrounds. After that I was on my own. Note that creating the background uses layers so when saving save as .psd file for later modification and as a .jpg for using as the background.
Create a new image 1450 x 1100 pixels. This will be your main background. Fill this layer with white. Create a new layer. Fill this layer with a pattern of your choice from the pattern selector. In this case I used a basket weave pattern. Create a new layer and fill this layer with the colour of your choice. I used a red that I liked using the colour picker. When you decide on the colour you want write the colour code down so you can co-ordinate other elements on your background, header and blog. Adjust the opacity on this layer to get the effect you want. Create a new layer and click on gradient overlay. Draw the gradient from top to bottom and adjust the opacity to get the effect you like. Leave the image open and create a second image 795 x 1100 pixels. This will be the panel where your header, posts and sidebar appear. Fill this layer with the colour or pattern of your choice. In this case I chose white and adjusted the opacity to the desired effect. Save this image as a .psd file for further modification. Merge the layers then use the move tool and drag the image onto the maid background. Centre the panel. Add a drop shadow to the centre panel adjusting as desired. Using the line tool create a line 20 pixels wide spanning the entire length of the centre panel. Fill with desired colour. Bevel and emboss as desired. Duplicate this layer. Use the move tool to move the duplicated layer to the other side of the panel. At this point you can now add any further embellishments you desire using additional layers. I chose not to add any but if you check out my personal blog you can see how I added a ribbon I made and use that as a guideline for placement. Other embellishments such as flowers, buttons and etc. can be found on a lot of scrapbooking websites or you can make your own using the shape tool.
Very important: Save your file as a .psd for Photoshop® and Photoshop Elements® or as a .psp for Paint Shop Pro®. This will preserve the layers so you can later modify any layer you choose to create a new background. Save the file again as a .jpg for uploading to a photo hosting website. If using Photobucket, upload the image at the 1 meg setting.
To install your background, upload it to a photo hosting site such as Photobucket. Copy the url location. Paste the location into the following script and save. Open the layout tab of your blog in Blogger. In the top header section, click on add a gadget. Click on html/javascript. Copy and paste the script into the box. Click save then preview to see your new, custom made background then click save.
Here's the code you need to install the background on Blogger:
 Header
Now that you have made a custom background you can make a custom header. This is also very easy to do. Create a new image 700 x 300 pixels. You can leave this transparent if you want to use the background colour of your blog. If left transparent, the final header should be saved as a .gif and uploaded to a photo hosting site then placed on your blog using the header tool on your layout and the url. This will preserve the transparency on Blogger. In this case I used the colour of my blog background that came from the lightest pantone of the red. To get to the pantone I put the colour code of the red into the colour selector then clicked custom to bring up pantone. The border was created using stoke with the red I wanted. Then I duplicated the layer and used the marquee tool to outline the inner section and deleted that on one layer. This created the red frame. Then I inversed the selection to work on the frame and used the bevel and emboss style to create the raised effect. To get the vellum effect I created a new layer and used the marquee tool to create a smaller rectangle. I filled that with white. Then I used a fuzzball brush to go around the edges and added a drop shadow. I used the font brush script to write the title of my blog then beveled and embossed it and added a light drop shadow. Save the file as either a .psd or .psp as well as .jpg.
To install the header: Go to layouts, page elements for your blog and click on header. Click on add picture from your computer or you can choose from url if you uploaded to a photo hosting website. Click on your header file .jpg. In a couple of seconds you should see your header. Under placement click instead of title and description then click save. Hit preview to see how your new blog header looks. The blog header background will still be present around the image. There are three ways of dealing with this. The first is the easiest by just leaving as is. The second method is to go into layout then html and expand widgets. Change the background colour as desired. The third method is to delete the header background
I hope you found this method useful for creating your own uniquely designed backgrounds and headers for your blogs. If you use this method please leave a comment with your url so I can see what you came up with.
Garden Gnome
©2006-2008


