What does a Garden Gnome do when she is not gardening, in the kitchen or doing genealogy? Well the answer might just surprise you so read the entries to find out more. This blog focuses on everything we do to make our house a home. There will be a strong emphasis on home energy efficiency and do-it-yourself (DIY) projects. At the same time there will also be crafts, knitting and crocheting projects along with any other little tips we do to create that down to earth, I want to be here home. Please enjoy your visit :)


Monday, May 31, 2010

Closing Up a Vacation Home

Vacation homes are generally used on a temporary basis regardless whether they are mobile (eg. RV, trailer) or permanent (eg. cottage).  At some point closing up a vacation home for periods of non-use becomes important.  In both cases the care and attention to detail that you take when closing up your vacation home will lessen the chance of problems while the home is closed up and lessen the work involved in opening it up for the next use.  There is some overlap as to chores so I will start of with those chores that are needed for both mobile and permanent followed by those specific to each.

Mobile and Permanent Vacation Homes

  • do a good general cleaning
  • check for and seal any possible entry spots for rodents and insects
  • remove any food that will spoil or expire before your next use
  • clean out the refrigerator, turn it off and prop the door(s) open to prevent mould and mildew
  • do any necessary laundry making sure there is no damp laundry that could mould or attract moisture loving insects
  • secure all windows
  • close all blinds and window coverings to prevent sun damage 
  • secure all doors

Mobile Vacation Homes
  • empty and flush grey and black water tanks then add RV anti-freeze
  • leave faucets open
  • pour holding tank deodorizer into the tank
  • if storing for winter remove any batteries and store where they won't freeze
  • turn off propane tanks and bleed the lines then turn off any controls
  • seal any outside ports (eg. electrical, water) and vents with heavy plastic secured with tape
  • place a couple of rodent baits and ant traps in the unit as a bit of insurance
Permanent Vacation Homes
  • discontinue any unnecessary services (eg. newspaper) depending on length of time the house will be empty; internet and cable can be left on if the house will be empty for under a month otherwise turn them off
  • forward any mail to your permanent address
  • close up any chimneys or fireplaces
  • turn off the water
  • turn off the AC unless in a location where it is necessary to leave it on, if so turn it up to 85ºF where it will serve to keep moisture out of the home
  • take in any outdoor ornaments
  • bring in patio chairs and secure the table or bring it in
  • notify at least one of your neighbours leaving contact information and a key in case of emergency
Garden Gnome
©2006-2010


Saturday, May 29, 2010

Appliance Chip Repair

Accidents happen around the house in the best of circumstances but when moving or settling in they are even more prone.  This is the time that little nicks and dings often happen.  While the nicks or dings don't affect the overall function they can make the appliance or piece of furniture look less than appealing.  There are a wealth of repair kits available for doing quick touch-ups for most furniture and appliances.  Most of these kits will cost less than $5 and with carefully following the instructions you can get a good, barely noticeable DIY repair.

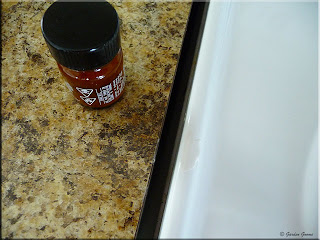
the appliance chip
The kitchen appliances in the vacation house are Maytag.  Quite frankly for this repair brand did not matter because each appliance manufacturer uses a slightly different colour if white to the point that a matching washer and dryer may not exactly match.  We are avid DIYers so that means even at the vacation house we will do it ourselves if at all possible.  My husband was removing the filter from the overhead built-in dishwasher when the screwdriver he was using slipped out of his hand crashing down onto the stove.  This left a rather nasty looking chip.  The chip could have been left as is but would be unsightly.  It would get worse over time with likely a bit of rusting.  We stopped at Home Depot to buy Porca-fix to fix the chip immediately.

appliance chip repair in progress
Porca-Fix is one brand of appliance chip repair products.  There are others but this formula will only need one application.  It is about $5 for the small bottle but most repairs you will only need  a drop or two from the built-in applicator.   It is rather easy to use with no special skills required. 

To use simple clean the chipped area good and be sure it is dry.  Then using the applicator dab on a drop or two.  If it runs a little wipe the drip with a paper towel.  The patch will be raised which is normal.  Let the patch dry fully.  Once the patch is fully dry it can be fine sanded using the provided sandpaper to give a smooth, barely noticeable repair.

appliance chip repaired
I let the patch dry for about 8 hours then sanded it.  The sanding brought the patch down to the same level as the original stove finish.  To the touch the patch is not noticeable at all.  If you look very close and know what you are looking for you might just barely notice the slight colour difference of the patch depending on the lighting.  This is something that cannot be helped given the colour variances in appliance manufacturers.  Your best results will be with black or white.  There is ivory but what is now called ivory is a lighter version of almond so if your appliance is actually almond then the repair will show a bit more but if done properly should still give good results.  At any rate this is an easy way to keep your appliances looking nice if a chip should happen.


Friday, May 28, 2010

Our Vacation Home

our vacation home
Our Vacation Home
May 19, 2010

The last few posts have been focused on vacation homes.  Regardless whether your vacation home is mobile (eg. RV, boat) or permanent (eg. cottage) making it a home away from home is very important.  Pictured is our new vacation home.  It is a 3 year old manufactured home in southern USA in a gated, park-like setting with a lot of very nice amenities including community activities and proximity to entertainment, shopping and restaurants.  The house was purchased based on the pictures and specific location so until our recent trip we had not actually seen what we had bought.  The house has 2 bedrooms, a den that could double as a third bedrooms, 2 baths, utility/laundry room, kitchen, family room and lanai (screened in porch).  There is a small attached shed as well.  The current gardens wrap around the house and are already planted so all we have to do is add our own personal touches.  We own the house but not the land however we are allowed to add landscaping such as trees and small garden beds as we choose.  The only stipulation by the HOA is the area be kept neat and tidy.  They cut and trim the yards so we don't have to worry about that.  There is a programmable sprinkler system to ensure that the gardens stay nice looking.  We are allowed to water on Monday's (county restriction) and garbage is collected Tuesdays and Fridays.  There are bins at the clubhouse for newspaper and aluminum can recycling but nothing for glass or plastic containers.

When we arrived we were immediately impressed over the condition of the house.  It had been sitting empty for about a year and a half so needed interior and exterior cleaning.  Surprisingly some furniture was included - dinette set, patio set, queen size bed, dresser, 2 night stands, couch, chair, automan, television and stand.  The kitchen appliances are Maytag - refrigerator, stove, microwave oven, dishwasher.  The refrigerator needed a really good cleaning as it had been turned off then shut but despite our fears of having to replace it we were able to restore it to norm.  The stove and microwave oven needed cleaning and a small chip repair for the stove.  The dishwasher appears to be missing a part so we will have that checked our next trip.  There is a garburator that will be handy since composting is not going to be much of an option for us.  We had the exterior pressure washed and the carpets steam cleaned while we were there.  We also did a lot of the basic stocking such as towels, kitchenware, and that type of thing.  Surprisingly this took a fair amount of effort as you really don't realize just how many basics you really do need and how much shopping is necessary to round up just the basics.  We bought another queen size matress and box springs for the master bedroom, a desk for the den and four replacement chairs for the patio set as those left behind were beyond salvaging.  Our next trip will focus on a few decorative elements and furnishings as well as the dishwasher repair and finding a washer and dryer.

Garden Gnome
©2006-2010


Thursday, May 27, 2010

Setting Up a Vacation Home (7) - Dealing With an HOA

Depending on the location of your vacation house you may have a home owners association (HOA) or similar.  These are commonly found in retirement communities where you own the building but not the land and in seasonal trailer parks.  In both of these cases there will be rules and regulations that you must follow.  The rules and regulations are to ensure the safety of everyone in the community as well as keep the community at a certain standard while protecting your investment.  Even though you own the building there may be some things that you will not be allowed to do to it.   


We have camped at many national, provincial, state parks as well as a private park or two.  All of them have rules of conduct mainly to control noise and prevent problems such as wild life getting into garbage left around the campsite.  The key rule at any national or provincial park is if a yoggie (park ranger) can hear you off of your campsite you are being too loud.  In addition to that there are provisions that if you are too loud or your campsite is not kept clean and tidy you can be evicted from the park.  Keeping the campsite clean and tidy is actually a safety issue.  Garbage attracts skunks, raccoons, rodents (eg. chipmunks, mice)  and bears all of which can cause personal harm directly (eg. attack) or indirectly (eg. disease). 


Our current vacation home is in a gated community with an HOA.  This is an ideal set-up for our purpose.  The front gate has to be notified of any visitors, delivery persons or workers coming to our home prior to their arrival.  While some would see this as restrictive it is meant for the protection and safety of all residents here and is no different than the requirements for national, provincial and private parks where visitors must register (including telling them who you are visiting) with the office before they can enter the park.   The HOA determines the level of garden upkeep which is basically keep it neat and tidy and gardens are encouraged around each house for aesthetics.  Mulch and personal touches such as garden decorations and flowers are encouraged.  They cut and trim all the yards.  The HOA will tell you to pressure wash the exterior if it gets noticeable moss or mould growing but most here pressure wash at least annually to protect their investment so this is not a real concern.  They will say something if let garbage pile up or water when you aren't supposed to but other than that they work rather quietly in the background.  What we really like is if we decide to rent our house out there is property management team to do all the necessary checks including a credit check for any potential tenant and take care of collecting the rent as well as ensuring the tenant does no damage to our house.  The nice part is our vacation house is always being watched even when we aren't here so that gives us a nice piece of mind.


If you follow the rules of the HOA or similar there will be no problems.  We have never had a problem at any of the national, provincial, state or private parks we've stayed at.  We've also have had no problems here.  If your vacation home is not in a location where there is an HOA or park rules then the next best thing is to get to know your neighbours well.  They will keep an eye on your house while you aren't there.  If your vacation house is in cottage country where everyone closes up about the same time each fall leaving many homes in the area empty for the winter see if you can find someone in the closest town that will check your house from time to time.  


Garden Gnome
©2006-2010


Wednesday, May 26, 2010

Setting Up a Vacation Home (6) - Opening a Vacation Home

Regardless whether your vacation home is mobile (eg. RV, trailer) or permanent (eg. trailer park, cottage) it will need to be opened up for the season that you will be using it.  In some cases as with cottages you may be using it once or twice a year then renting it out for the rest of the season or you may be using it several times a year yourself.  The opening chores will be dependent on whether the vacation home is mobile or permanent.  Always plan on the first trip as being a working vacation.

Mobile Vacation Homes (eg. RV, trailer)

Mobile vacation homes have all the opening chores such as spring cleaning, checking appliances and lighting, and stocking with whatever non-perishable foods that can safely stay in the unit when not in use as a permanent vacation house has.  However, mobile units will need to be checked for travel safety issues such as tires, brakes, working signal lights, working clearance lights, and if the mobile unit has an engine all the fluids as well as the engine should be checked prior to the first trip out.  The propane tanks may need to be checked and filled.  All appliances should be fired up prior to the first trip to be sure they are working properly.  Replenish any necessary repair items (eg. fan belt, light bulb) prior to your first trip.  Check any holding tanks to be sure there is no leakage.  Add fresh black water holding tank deodorizer.  Check all window and door screens.  Open and clean any awnings.  Finally do a trial hook-up or start-up to ensure everything is working properly before heading out for your first trip.

Permanent Vacation Houses (eg. trailer park, cottages)

Opening a permanent vacation home will depend on how long it was closed up and how it was closed up.  In most cases little more than a good cleaning will be needed inside.  If utilities are turned off for the time the house is closed up arrange to have them turned on the day you arrive or a couple of days before providing you can arrange for someone to be there when they are turned on.  If there is a hot water tank it will need to be fired up.  Once the water is turned on flush the lines for a good 10 minutes.  If water was sitting in toilets there will more than likely be mould to clean-up.  Water should never be left in toilets where freezing is a problem.  The refrigerator will need the interior compartments washed then it can be turned on.  Check all window and door screens as well as locks.  Use a bit of graphite in the locks to ensure they operate properly.  The exterior of the house should be checked for any necessary repairs.  The exterior may need pressure washing as well.  Any gardens will need to be weeded, planted if necessary and the mulch topped up.  The yard will need to be groomed as well if that isn't included as part of your vacation house.  Outdoor furniture will need to be cleaned and set out.

Garden Gnome
©2006-2010


Tuesday, May 25, 2010

Setting Up a Vacation Home (5) - Stocking Up

x
A permanent vacation home serves as a home away from home.  It helps alleviate the costs of going on vacation while providing you with a temporary home base.  A home base helps reduce food costs because you can make a lot of meals from home rather than eating out all of the time.  It also saves on the costs of motel rentals.  The caveat being the vacation home is located in an area you will enjoy vacationing in for a number of years with the possibility of earning a rental income from the property making the cost of acquisition and set-up the frugal choice.  With that in mind the vacation home really needs to be set-up much the same as your permanent home.  That means all of the things you would normally need at home you will need at your vacation home.  Essentially you are setting up a second home complete with all those things you are used to using at home.  Setting up your vacation home in this fashion makes it easier to rent out as well.

We have spent the last several days setting up our vacation home that we intend to rent out during the times we are not using it.  The vacation home surprisingly came with a few basic pieces of furniture however that is not the norm although in some areas you can buy a fully furnished vacation home.  We had to do a fair amount of shopping for just the basics.  Expect to pay about $1,700 to $2,000 for just the basics if the house is empty or close to being empty when you buy it.  If your vacation home is close enough to your permanent home then definitely take what you don't need at home each trip to help reduce the costs of stocking the vacation home.  Here are some of the resources we relied on:

  • department stores (eg. Wal-Mart, Home Depot) - Department stores are great for small appliances, towels, tools, kitchenware.  A large box store will likely have the lowest prices for any landscaping needs as well as home maintenance you may need.
  • dollar stores - Find a dollar store where all the items are $1 not one where they vary in price.  A surprising number of household items can be bought from the dollar store ranging from garbage bags to glassware to kitchen extras and so much more.
  • warehouse stores (eg. Sam's Club) - The cheapest prices for things like CFL bulb and cutlery can be found at warehouse stores.  These types of stores are also great for stocking up on any food basics if you will be maintaining a well stocked pantry at the vacation house (more on this in the next post).
  • discount/liquidation stores (eg. Big Lots) - These types of stores are really great for knock-down furniture and decorative elements.
  • resale/consignment shops -   You can save a lot of money by buying at these types of shops however you have to be prepared.  Many do not deliver meaning your have to get your purchases home.  From experience a queen sized mattress and boxspring will ride securely on top of a rental van and some furniture will fit inside nicely but unless you rent a truck you will be restricted as to what furniture you can cart home.  You also need to consider that once at your vacation home you may need help getting furniture from your van or truck into your house that depending on the location is not quite as easy as you think.  


Garden Gnome
©2006-2010


Monday, May 24, 2010

Setting Up a Vacation Home (4) - The Essentials

There are a few essentials with setting up a vacation home.  They will differ depending on whether you are mobile or permanent.  From experience the following may apply for your vacation home whether mobile or permanent:

  • insurance - This is a must have for either mobile or permanent vacation homes.  Go through an insurance company specializing in this type of coverage and make sure your investment is covered.
  • license - This basically applies to mobile units and manufactured homes.  Traditionally built cottages will not have a license.
  • lot rental/lease - Both mobile and permanent vacation homes can have a lot rental or lease charge depending on location.  Essentially you own the house itself but the land is either rented or leased.  
  • utility connections -  Utility connections may or may not be included with lot rental for mobile units.  In general you pay more for utilities in mobile/provential/national parks and some may not offer utility hook-ups.  Parks specializing in seasonal lots where you park a mobile unit for the season and normal vacation homes (cottages, etc) will normally have utility connections for a fee.  In permanent locations getting the utilities connected is the same as getting utilities connect to a regular house.  You may or may not need a deposit and you will need to arrange to have someone there when the utilities are being turned on.  For permanent vacation homes the utilities may offer an option to have them turned off for an extended period when the home is closed up.  This is especially useful for internet and phone BUT not necessarily helpful for hydro or gas.  In northern Ontario you may need to keep a low level of heat on to prevent pipes from freezing or turn the water off entirely and drains the lines if pumping from a local lake.  In the southern States and Caribbean countries it is necessary to leave the AC on to prevent humidity damage, specifically moulding problems.
  • basic maintenance -  The problem with permanent vacation homes such as cottages is they are going to be closed up for extended periods of time.  There-in lies the problem.  In a normal house you are able to catch minor problems before they become major problems.  When a house is closed up for any period of time insects, rodents, humidity, snow/ice and moisture can all cause problems and get out of hand during the time the house is closed up.  The real trick is to anticipate any of these problems then take preventative measure before they become a problem.  In addition to the basic DIY maintenance you may have to have certain hired out maintenance work performed in your absence.  You will need a list of trusted maintenance workers to do this work as well as a trusted neighbour with the key to your vacation home.
  • contact information - Your neighbours need your home contact information so they can get a hold of you in the event of an emergency.  At least one trusted neighbour should have a key to your vacation home so they can enter in the case of an emergency.  At the same time you need to have their information and make sure you keep in touch during any periods that your vacation home is not occupied.  


Garden Gnome
©2006-2010


Sunday, May 23, 2010

Setting Up a Vacation Home (3) - More Basics

Location and mode of transportation are going to greatly influence what you can and can't take from home with respect to furnishings and supplies.  If the vacation home is located in a remote area or in seasonal area such as Grand Bend, ON, then getting supplies won't be difficult during the peak season but off season it will be questionable.  If your vacation home is located further north say around  Huntsville, ON and further north you really do need to take a lot of supplies with you.  If you are traveling by personal vehicle taking a lot of extra supplies works nicely.  However, for this vacation home we have the choice of driving or flying.  Flying then renting a vehicle works out to pretty much the same cost as driving but saves us a good day and a half in travel time.  On a shorter visit flying is the better choice but means there is a lot less we can bring with us.

We have several friends who have cottages in the northern areas of Ontario.  My husband stays at one for a week each year.  They seriously take everything they will need for that trip.  The only real option is to bring items such as food, bedding, furniture, kitchenware and just about everything else usually via a utility trailer hitched to their vehicle.  Occasionally in that area you may find used furniture for sale and in most cases buying a cottage there will include household contents but not always.  A grocery store may be within 40 miles but will have limited offerings and higher prices than you are used to in your regular grocery stores.  Still there is only so much you can bring with you so at some point you will need to shop at one of these smaller grocery stores.  In the northern areas fast food is likely going to be close to non-existence but this is a great opportunity to find little family run restaurants specializing in home cooked meals.

Our vacation home is located in the southern US.  A utility trailer hitched to the vehicle is not an option given the make of our vehicle as well as border issues.  Packing the vehicle with items to bring down works providing they are not food items not allowed by US Customs.  We will be using this method from time to time but reality dictates it is a bit more frugal to buy what we need locally when here.  Flying out presents a whole new problem because there are restrictions as to what you can bring.  By far the easiest solution is to buy what you need to stock the house when you arrive.  Unless it is a product that you can't get in the country where your vacation home is, buy what you need there.  If you are bringing in any product from Canada to a foreign country including the US make sure it allowed first.

Garden Gnome
©2006-2010


Saturday, May 22, 2010

Setting Up a Vacation Home (2) - The Basics

We have had some type of vacation home since our kids were young.  It all started with camping then escalated from tents to a large travel trailer.  So we basically took our home with us.  We've now moved on to a permanent as in not mobile vacation home.  Over the years we have learned there are basics to setting up any vacation home.  First off there are a few basics to consider:

  • rental or owned - Renting a vacation home generally means a lot less set-up so all you have to do is take the basics for the period of time you will be there.  Leave the place clean then lock-up when you are finished.  If you own the vacation home as we do there is a lot more involved.
  • temporary/seasonal/permanent - The time frame makes a huge difference.  Each has their own specific considerations.  For example if the vacation home is temporary as a campsite the prep is different than renting a seasonal campsite lot.  Permanent as ours is results in more things to consider such as ongoing insect control and local weather patterns.
  • amenities - A mobile vacation home is great in that if you don't like the amenities at one location you can move to another one that provides what you want.   A permanent location is a bit more challenging.  In general you will want easy access to a grocery store and laundromat at the very least for mobile  vacation homes along with portable water and restroom facilities.  When it comes to permanent vacation homes you really do need to consider neighbours as well as access to grocery store and possibly laundry facilities.  In all locations, emergency health care must be a consideration.  Lack of amenities will mean more planning on your part.  If electricity is not available in a permanent location such as a cottage up north then you may need to consider a solar system if one is not already installed.  If amenities such as a grocery and hardware store are some distance from your vacation home that is another thing to consider.
  • purpose - When we bought our large, self-contained travel trailer it was for personal use only with no intentions of renting it out.  Mobil units present a host of rental nightmares that are best left alone.  However, permanent vacation homes such as this one present the option of renting it out for parts of the year you won't be using it.  The question becomes whether to restrict the rental to family and friends only or open it up to anyone who meets your rental requirements.  There are pros and cons for both types of set-ups.  Once you have decided on the purpose you need to establish firm rental guidelines if renting it out or usage guidelines if letting friends or family use it.  

Garden Gnome
©2006-2010


Friday, May 21, 2010

Setting Up a Vacation Home (1)

Over the past week or so I have had the great pleasure of setting up our vacation home. The two assets that assisted me on this endeavour were frugality and experience.  We started with a somewhat empty, in need of cleaning vacation home that was partially furnished with all appliances except washer and dryer when we bought it.  Trust me we were grateful for ever piece of furniture and appliances that came with the house!  Now picture this a nice kitchen with nothing other than large appliances.  Do you have any idea as to how much is needed to get a kitchen going?  It seriously was mind boggling and that is where both frugality and experience comes into play.  The next few posts will give a few tips on setting up a vacation home to make it feel like a home not just a pit stop.

Garden Gnome
©2006-2010


Thursday, May 20, 2010

Finding Farm Stands

I strongly advocate buying locally as close to home as possible.  Ideally we try to consume foods that are grown/produced/sold within a 100 mile radius of our home.  I followed the 100 Mile Challenge a television series hosted by James MacKinnon and Alisa Smith and prominent locavores where 6 families took the 100 Mile Challenge to eat locally for 100 days.  What really amazed me is the amount of complaining about what they couldn't eat brought up by these familiess.

A 100 Mile Challenge would be rather easy where we live.  Surprisingly this does not eliminates a many foods as you would think given our location.  We are in the food belt of Canada which means a lot of locally grown foods.  Surprisingly sugar beets are grown in our area that are refined into sugar in Michigan still coming within the 100 mile radius and salt is mined also near-by.  We also have locally produced wines, whiskey and beers.  It's easier to list some of the foods that aren't grown locally such as peppercorn, cocoa, coffee beans, black/green teas, most citrus and tropical fruits, wild salmon (although occasionally locally caught), cinnamon, vanilla beans so there are definitely some foods we would have go without if doing a full challenge.  However, we aren't doing a full challenge so it works out that about 90% of the foods we consume are grown/produced/sold fall into the 100 mile radius.  The first question many ask is how do you find the smaller roadside stands?

roadside sign
Finding roadside stands in our area is not difficult.  Some are listed in Ontario Foodland pamphlets and some do a bit of advertising but for the most part finding the smaller ones are by word of mouth, luck or serendipity.  A slow drive through the countryside is sure to uncover roadside stands.

Pictured is a roadside stand sign we spotted while picking up our beef.  As roadside signs go this one is quite nice and at least visible before having to slam on the brakes then to do a quick reverse.  What is even more annoying is after you do all this the stand may be closed.  A lot of times the stands use the honour system self-service of trusting you to put the money in a provided container.  In most cases signage is hand written on small pieces of board nailed to wherever they can nail it so quite often there is little notice.

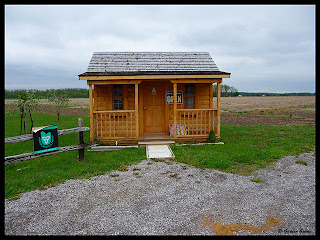
roadside stand
Signage is a great way to find roadside stands.  In Ontario look for the Foodland Ontario sign as well although as in this case it is not where you could easily see it from the road.  Farm stands are usually rather plan with a table for the produce and some type of sun protection over top.  Many serious sellers are putting up fancier shed shops.  They aren't big, only about the size of a large garden shed but they do standout against the landscape well before seeing the farm stand sign.  They are usually set fairly close to the road.


Bon Appétit!

Garden Gnome

Garden Gnome
©2006-2010


Wednesday, May 19, 2010

Kitchener Stitch to Finish a Sock

Learning new knit stitches and stitch patterns greatly expands the items you can knit.  Video tutorials are great for learning new knit stitches because the provide a good visual of the technique.  At some point I will be making my own video tutorials but for now I'm relying on those already made.  The following video shows how to do the Kitchener stitch aka grafting.  This stitch is used to finish socks and other items where grafting is needed.   Start with about 12 inches of yarn to close the stitches using the Kitchener stitch.  When you are finished closing the stitches, pull the end through to the inside of the sock.  Weave the end through several stitches and them trim the end.


Garden Gnome
©2006-2010


Tuesday, May 18, 2010

Keeping Towels Soft and Absorbant


A lovely, warm and fluffy towel is a treat to wrap in after a nice hot shower or warming up after swimming.  So how do you keep towels soft and fluffy?  When it comes to towels it it is important to wash any new towel in hot water with baking soda added.  This will remove any residues remaining from the manufacturing process.  Add vinegar to the rinse cycle to set dark colours, remove detergent build-up and any lingering odours.  Do not use fabric softener as this will leave a residue on the towels that will affect absorption.  Quite often amongst the frugal crowd there is the suggestion to toss a couple of new tennis balls into the dryer along with the towels.  This is not a good idea as new tennis balls will off gas resulting in residues left on your towels.  Tennis balls are not meant for use under higher heat conditions as found in dryer conditions so should not be used in a dryer.  There are specially formulated dryer balls meant for this purpose so use one of those instead.  Towels that have been air dried can be harsh, stiff or scratchy.  The work around for this is to use vinegar in the rinse then hang to dry.  When the towels are almost dry finish drying in the dryer. 


Garden Gnome
©2006-2010


Monday, May 17, 2010

In Just 15 Minutes...

I think since the dawn of my television years I have always hated commercial breaks so used that time to multi-task.  It is actually how much housework or homemaking tasks can be accomplished just during commercial breaks!  Then I came across an idea of seeing how much you could accomplish in a 15 minute period under the rule that when the 15 minutes was up you stopped whether the task was completed or not.  Well that fit right in with my idea of homemaking!  I quickly reasoned that a few 15 minute homemaking sessions a day and I could keep the house looking neat and tidy without spending a long cleaning session each day.  Somehow breaking the work into smaller, manageable sessions made the work go a lot faster and it was more enjoyable.  At the same time this method kept me moving throughout the day.   

Here are a few things I do in just 15 minutes:
  • bathroom tidy-up
  • kitchen tidy-up
  • cooking/baking prep
  • fridge clean-out 
  • weed my garden beds 
  • fold and put away clothes
Garden Gnome
©2006-2010


Sunday, May 16, 2010

How-To Make Your Own Natural Dye with the EtsyLabs

Natural, eco-friendly dyes are as close as your own back yard.  They can be used to dye yarns, cloth and even clothes much the same as you would using a commercial dye product.  Natural dyes can also be used to paint wood projects.  In fact one green idea I saw on HGTV used red wine to stain the hardwood floor.  A protective finish was applied.  It really was gorgeous!  So think outside of the box when using natural dyes.  Here is a short video of the process of making a natural dye along with the results.


According to the Pioneer Thinking article, Natural Dyes from Plants, the plant, berry or nut material should be collected then the dye made using twice the amount of water to plant material.  The material to be dyed should be soaked in a fixative before dying.  For berry dyes use 1/2 c salt to 8 c cold water as a fixative; for plant dyes use 4 parts cold water to 1 part white vinegar.  This article also has a large list of plants, nuts and berries that can be used as natural dyes with their resulting colours.  It is well worth printing out for further reference.

Garden Gnome
©2006-2010


Saturday, May 15, 2010

New Honeywell UtilityPRO™ Programmable Thermostat Installed

Earlier this month I wrote about enrolling in the peaksaver® program through HydroOne.  This program is designed to help conserve electricity during hot summer weekdays when electricity usage is very high and electricity supply is critically low.  HydroOne can send a signal to the peaksaver® thermostat to turn our AC tempertaure up by 2 degrees Celsius between summer peak demand hours (2 pm - 6pm).  In return for participating in this program we get a one-time $25 credit on our electricity bill, a free professionally-installed programmable thermostat ($250 value) and energy savings if the peaksaver is activated.  The technician came out this week to install the new thermostat.

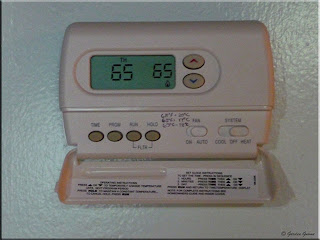
old thermostat
Our old thermostat is really not all that old.  It was installed when we replaced the central air conditioner a couple of weeks after moving here.  The thermostat was $50 and we received a $25 rebate on it since the thermostat was replacing an ancient non-programmable one.  This was the only thermostat available through the company that installed the air conditioner.  Right from day one I hated it!  Blazened in bright red was their company name and logo so we left the door open most of the time.  Unlike the Hunter programmable thermostat we had at the last house this thermostat was low quality.  It only showed the temperature in degrees Farenheit with option to change to degrees Celsius something I found quite irritating.  The display on the left conuously flashed between indoor temperature and time which was annoying as well. 

Honeywell UtilityPRO™ Series Thermostat
The new thermostat is a Honeywell UtilityPRO™ Series touchscreen programmable demand control thermostat.  The backlit screen remains lit all the time, brightening when the display is touched.  It has the ability to receive messages from HydroOne as well as usage and current tier rate.  Although these controls are shown in the manual they aren't lit on our yet likely because our SmartMeter while now automated is not on Time of Use (TOU) rates yet.  I suspect that they will show once we are switched over to TOU rates. 

If HydroOne triggers the peaksaver the word RAMP will appear at the top of the screen to indicate the start of the adjustment period.  When the 2ºC increase has been reached the word SAVINGS will apper along with a smaller flashing icon.  During this time we will not be able to control the thermostat.  Once the adjustment period is over the word RECOVERY will appear and the temperature will decrease, returning to the original temperature.  The thermostat screen will go blank if the furnace shuts down while operating due to a restricted airflow.  It actually did this twice after being installed.  The technician found two small and very clogged filters we did not know existed that were at one time part of an air cleaner so removed those.  He also said we should have the external heat exchanger coils cleaned.  The screen will also go blank if there is a power outage but all settings are retained so the thermostat will reset itself when the power returns.

A nice bonus feature of the peaksaver thermostat is we can log onto the peaksaver website anywhere that we have internet access and control thermostat settings.  This is a nice feature that will end up saving us money.  We turn lower the thermostat heat setting when away during the winter.  Quite often when we are on vacation or travelling we may decide to stay a bit longer but if we only set the thermostat for the planned number of days the temperature goes back up to the regular program mode meaning we pay for the higher temperature for a couple of days even though we aren't home.  Now it will be as simple as logging in and making the necessary temperature adjustment.  We can also program it to increase the heat about a half hour before we get home so we aren't coming home to a cold house.


Garden Gnome
©2006-2010


Friday, May 14, 2010

Kitchen Knives

A vast majority of the meals we eat are home cooked from scratch.  It's funny when I first started out as a newlywed I did not appreciate the importance of descent kitchen knives.  I was quite content to use second hand, yard sale find knives.  The sad part about this is not only did I not know what to look for in a knife but I likely over the years had some very good knives without realizing it.  The end result was I got used to poor quality or improperly maintained knives.  As I learned more about cooking it became quite clear that the leading cause of injuries in the kitchen is a dull knife.

kitchen knives
Over the years I have gradually improved the quality of my kitchen knives and learned how to maintain them.  I've learned what I like and what I don't like in a knife.  I definitely do not storing my knives in a wood block but rather prefer a magnetic strip.  I also learned that my knife needs continue to evolve which means my knife collection tends to change from time to time.

Various knife designs have different purposes and for that reason I don't like knife sets.  What I like is to find the knife that meets my need and most important has a good hand fee.  Pictured are my current knives in action.  The red handled knives are Paderno, the white are Tramotina while the rest are Cuisinart.  The Paderno and Tramotina are press blade knives while the Cuisinart are forged blades.  Forged blade knives have a bolster (blue arrow) to provide balance and control.  The bolster indicates how thick the steel was when it was forged.  Pressed blades do not have a bolster but rather an attached handle.  My pet peeve with pressed blades and the handles is germs can get into that joint leading to contamination.

The blades themselves are very important.  The Tramotina are German high carbon steel.  That means they will keep a sharper edge longer providing they are properly maintained.  If at all possible buy knives with German steeel blades.  The Paderno and Tramotina are NSF (National Santitation Foundation)  certified so they are commercial quality.  I have 2 Santoku knives that have little pockets (red arrow) known as kullens.  These are air pockets designed to prevent food sticking to the knife when cutting.

more knives and sharpener
In additon to the knives on the magnetic strip I have a cleaver (Whiltshire), a couple of heavy duty steak knives and a small paring knife that sees a lot of use.  Not pictured are the various knives that find their way into the cutlery drawer.  I use a hone (steel) to keep the blades straight and and a manual knife sharpener to keep my knifes sharp.

The blade design determines the knife usage which is one reason why I don't recommend buying knife sets.  A 10 pc knife set is lovely but if it comes with a fillet knife that you won't use the knife just collects dust.  A good variety of of knives with different blades is necessary to ensure you have the right knife for the application.  Equally important is the hand feel with respect to handle size, handle fit and knife weight.   An improper handle fit for your hand can cause muscle fatigue.  Those with smaller hands may need smaller handles and even lighter for the knife to feel comfortable without causing fatigue during use.  If there is more than one cook in the kitchen you may gave to do as we do and have knives suited for each cook.

Garden Gnome
©2006-2010


Thursday, May 13, 2010

An Excellent Dollar Store Find - Canning Jar Lids

I do a lot of canning upwards of about 1,200 jars each year.  While the jar rings can be reused the snap lids themselves should not be reused for canning although they can be used for vacuum sealing dry foods.  For those doing a small amount of canning the price of the lids may not be a huge issue but with the amount of canning I do finding lids at the lowest cost becomes a priority. 

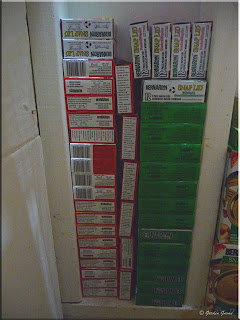
canning lid stash
I store my lids in the pantry where it is cool and dark.  They are stacked out of the way and off the floor in the space between two wall studs.  Pictured is my current stash of snap lids in two sizes, standard and widemouth.  Not pictured is the few boxes of gem sized lids.  While it looks like a large number of lids the reality is only 44 boxes so 528 lids meaning I have to do a fair amount of stocking up on lids.

The price of the snap lids is based on their size with the standard size (70 mm, red box) being the least expensive.  The gem lids (78 mm, not pictured, yellow box) are more expensive and the widemouth lids (86 mm, green box)  are the most expensive.  I have paid as much as $3.79 for a box of standard lids when in a pinch which works out to 32¢ per lid.  Last year I discovered the dollar store had both standard and widemouth lids for $1 per box of 12 bringing the cost down to 8¢ per lid.  That makes a huge difference!  The dollar store has recently changed hands so items that were $1 are now $1.25.  The standard lids are $1.25 for 12 ( 10.4¢ per lid) while the widemouth lids are $2 (16¢ per lid).  This is the cheapest price I have found for the snap lids.

canning lids
I mentioned in a recent post that some snub their nose at buying in a dollar store because everything is cheap imports from China.  That simply is not true!  The Bernardin™ lids I am buying are exactly the same as those sold in Canadian Tire and Home Hardware at more than double the price the dollar store is selling them for.  Bernardin™ is the Canadian equivalent to Ball® in the US.  Both brands are now owned by Jarden Home Brands who manufactured all mason jars and lids in North America.  Ball® and Kerr® brands are sold in the US while Bernardin™ is sold in Canada.  The lids are manufactured in the US and distributed in Canada through Bernardin™ out of Toronto, Ontario.  Bernardin™ in Canada also distributes mason jars and canning publications.

Garden Gnome
©2006-2010


Wednesday, May 12, 2010

A Simple Moisture Solution

The main living level of our house is mainly below grade similar to a walk-out basement but a bit different.  Any area below grade is subject to higher humidity levels so the area is cooler with a hint of dampness. We are quite lucky that our lower level walls are about 18 - inches thick and well insulated.  In addition to that we have done a lot of air sealing.   On rainy days mainly spring and fall or on high humidity level days in the summer the lower level feels a bit damper which is quite normal.  Once we solved the plumbing/drainage problems moisture late last summer we noticed the lower level wasn't as damp in the fall.  Dampness can cause odours, molds, mildew and attract insects.   Our dampness issue is not bad enough to warrant running a dehumidifier. 

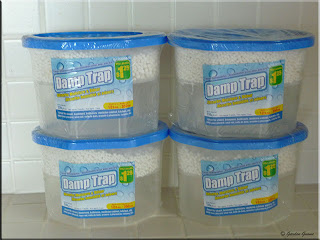
damp trap
About a year ago I spotted Damp Trap at the dollar store so decided to try a couple.  I was pleased with their performance enough that bought a few more on my recent trip to the dollar store.  What I like is these moisture absorbers are compact enough that they can be put in discrete areas so they aren't visible. 

Each moisture trap will absorb up to 12 oz of moisture and lasts about 3 months.  They are easy to use as well.  Once the plastic wrap is removed a foil seal needs to be removed then the plastic cap put back on.  Simply set the damp trap where desired and forget about it for about 3 months.    That's it!

used damp trap
When the calcium chloride pellets are absorbed there will be a good layer of water under where the pellets were sitting.  Remove the white moisture-permeable white layer and dump out the water.  The containers can then be tossed or cleaned out for the recycle bin or used in the garage. 

The moisture traps do look rather groatty with the water layer being dirtier in some traps depending on where they were.  I clean the used moisture traps out then put them into the recycle bin.  I think this is a low cost, non-electric but effective  way to solve minor moisture problems.  It costs about $9 per year for the number of moisture traps we use.

Garden Gnome
©2006-2010


Tuesday, May 11, 2010

A Few Dollar Store Finds

dollar store finds
A Few Dollar Store Finds
May 8, 2010
Last month I posted how  dollar stores are the new five and dime.  Some are a bit snobbish in that they feel dollar stores on sell cheap products and in fairness some products from China have really gotten a bad rap in recent months.  Despite this problem as long as you are an informed consumer there are a lot of excellent deals at the dollar stores. While a lot of products are from China a surprising number are from other countries including Canada and the USA.  Dollar stores are now carrying a lot more in the lines of groceries so they are quite popular with families trying to save a few dollars on their grocery bill.

Two or three times a year I check out a dollar store usually spending about $50 each time.  The times tend to be rather specific to spring when I'm gearing up for gardening, mid-summer before the busiest of the canning season and during the holiday season.  Of course a few other items find their way into the cart.  My recent dollar store shopping trip was to pick up damp traps (next post) and canning jar lids (the following post) along with a few gardening supplies.  I ended up spending $61.17 ($2.63 GST, $4.04 PST) total.

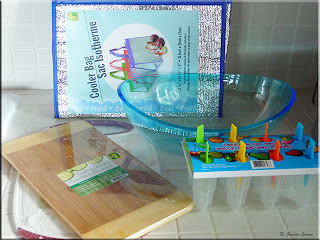
Pictured are a few of the extras I bought.  We have been using reusable cloth shopping bags for quite some time and we did splurge on a large insulated shopping bag that likely holds about 3 times the amount of cold foods as a normal shopping bag.  I found an insulated cooler bag at the dollar store for $1.25 that is about the same size as a normal shopping bag just perfect for bringing cold foods home from the grocery store when we aren't buying a lot.  This will help keep the food in the food safe temperature zone.  My cutting boards are getting to the point of needing to be replaced so I bought 2, one bamboo and one polyethylene.  Bamboo has natural antibiotic properties which is quite appealing but I want to see how the bamboo cutting board works with my knives before changing out the cutting boards.  This is an inexpensive way to do a kitchen test for performance.  I really like acrylic serving bowls for entertaining!  They have a nice sparkle while being functional indoors and out.  Since some of my serving bowls tend to develop legs throughout the year it seems I'm always replacing a piece or two.  I really liked the sparkly blue of the acrylic serving bowl that will look gorgeous on our dock!  I also bought a popsicle mold for when the grandbabies visit.  I can fill these with healthy juices for a summer treat.  The cost of the items pictured was $7.75 but they are are functional items that will last quite some time and save money over their lifetime.

Garden Gnome
©2006-2010


Monday, May 10, 2010

Refrigerator Thermometer

One of the biggest energy users in any home is the refrigerator.  If the refrigerator or freezer compartments are set too warm there is an increase in food spoilage along with food borne illness.  If the refrigerator or freezer compartments are set too low there is an increase risk of some foods freezing when they cannot handle being frozen.  Too cold of a setting results in the refrigerator cycling more costing more in energy costs.  The refrigerator compartment should be between 35ºF and 40ºF while the freezer should be 0ºF or lower.


We have a Whirlpool® ED2FHGXS EnergyStar qualified refrigerator bought in March of 2006.  When we bought the refrigerator were had space restrictions that limited what we could buy.  Like many refrigerators ours has a sliding temperature control.  Essentially if food in the refrigerator feels too cold or starts to freeze then the slider is moved to a warmer setting.  The problem with this type of temperature control is there no indication whether the refrigerator and freezer compartments are being cooled to the proper temperature.  This means you could be putting your family at risk for food borne illness, experiencing more food loss, and using more electricity than needed.

refrigerator thermometer
If your refrigerator has a temperature control similar to the one pictured the way to be sure the compartments are at the proper temperature is to use a refrigerator/freezer thermometer.  Place the thermometer in the refridgerator and leave about a half hour to get a good reading.  When I took the inital reading the refrigerator compartment read just on the high end of the safety zone.  I adjusted the slide control just slightly more towards cold then let the refrigerator run at the new setting for 24 hours.  A recheck of the refrigerator temperator showed the compartment was now in the middle of the safety zone.

The refrigerator and freezer compartment temperatures should be checked on a regular basis.  During the summer month or periods of high usage the refrigerator temperature may have to be adjusted to a colder setting.  The pictured refrigerator/freezer thermometer cost me $5.99.  Digital models are available for about $20.  I think they are a good investment that helps to increase food safety while improving energy conservation.

Garden Gnome
©2006-2010


Sunday, May 9, 2010

Stocking Up on Sunblock

Sunblocks
May 4, 2010

We use a lot of sunblock year round to protect us from the sun's damaging rays.  During the winter months we use sunscreen or sunblock on exposed skin because even though the sun is lower in the sky it can still have a damaging effect.  May through October we spend a lot of time on the boat where the damaging rays of the sun are magnified through reflection so we need stronger sun protection.  We also live on waterfront property so spend a lot of time on the dock where sun protection is also needed.  It is very important when boating and indulging in water activity to use a water resistantbroad spectrum UVA/UVB sunblock.  It is also important to wear some type of sunblock on your lips.  Last year I experienced my very first cold sore while on vacation.  It was not a pleasant experience!  I have since learned that sunlight exposure can trigger the virus responsible for cold sores so now wear lip protection all the time.  I recently stocked up on a variety of sunblocks including lip sunblock.  This will not be enough to get us through the boating season but it is a start.  Since we have little ones visiting us as well as going boating with us I always keep extra sunscreen and sunblock on hand both at the house and on the boat.  We also keep a bottle of sun block in each vehicle and my husband keeps one in his golf bag.

Garden Gnome
©2006-2010


Saturday, May 8, 2010

Eyelet Edged Dishcloth

Last month I gave a very easy pattern for a knitted  simple plain edged dishcloth.  These are ever so easy for even a beginner knitter that you will want to work up several for gift giving.  Knitted dishcloths do not have to be plain jane though.  Adding a simple eyelet stitch to a dishcloth can make it look fancy while still being utilitarian.  This is one of my favourite knitted dishcloths.

eyelet edged dishcloth
Pictured are a few eyelet edged dishcloths I recently made waiting for the finishing touch of weaving the ends in.  I mentioned in my previous dishcloth post that I like using varigated yarns for utilitarian projects because they add a bit of interest.  While the varigated cotton does work up nicely for this pattern I thing the eyelets are a bit more prominent using a plain colour cotton.  Either way it is a very easy pattern that many beginner knitters will be able to knit.  This pattern introduces the eyelet stitch which simply is a yarn over (YO).  To do this stitch, knit as normal then when YO take the yarn from the back of your work and place it over your needle then to the back and knit the next stitch.  This results in an increased stitch that when knit on the reverse gives an eyelet.  In most projects the YO is paired with knit 2 together (K2tog) to keep stitch number the same while forming some type of pattern with the placement of the eyelet stitches.


Eyelet Edged Dishcloth Pattern

I used Bernat® Handicrafter® cotton 4 ply worsted weight and 4.5 mm needles.

cast on 4 stitches
K 2 rows
K2, YO, K2
K2, YO, K3
*K2, YO, K to end of row*
repeat * until there are 50 stitches on your needle
**K1, K2tog, YO, K2tog, K to end of row**
repeat ** until 4 stitches on needle
K 2 rows
cast off.


Friday, May 7, 2010

Home Energy Audit in Ontario, Canada

In Ontario there are* were two homeowner retrofit programs providing rebates for improving home energy efficiency in an effort to help conserve energy.  In order to qualify the home must be a single family home and have a home energy audit conducted by a certified home energy advisor whose company is licensed by Natural Resources Canada.  A home energy audit is a detailed survey of your home's energy use.  It includes an attic to basement assessment of your home's insulation, heating and cooling systems as well as other energy uses.  It also includes a blower door test to detect air leaks and drafts as well as a personalized Energy Efficient Evaluation Report with recommendations on how you can improve your home's energy efficiency.  Many of the recommended energy-saving upgrades identified for the Government Canada’s ecoEnergy program* and the Ontario Home Energy Savings Program retrofit rebates.

In this short video by the Ontario Ministry of Energy and Infrastructure energy advisor Vince Hughes walks homeowner Sheilah Doherty through her home’s comprehensive home energy audit.  Energy leaks found in the home are highlighted. 


Even without the available rebates, having a home energy audit done is a good idea.  Most homeowners know there is room for improvement when it comes to energy efficiency and conservation.  They also know the major retrofits needed.  For example we know the furnace is old but it is efficient and we were told not to replace it until it dies given the condition.  We also know the hot water tank needs replacing which we are planning to do if we decide to stay here.  A home energy audit can help identify those little air leaks and other problems you might overlook.  At $300 it is a worthwhile investment in your home.

*On March 31, 2010, the federal government suddenly and unexpectedly announced funding cuts to the ecoEnergy Retrofit Homes Program. It is unknown if the program will be re-instated and how it will affect the Ontario Home Energy Savings program.  At this time the Ontario government continues to pay a $150 rebate for a home energy audit and provide up to $5,000 in rebates.

Garden Gnome
©2006-2010


Thursday, May 6, 2010

We Enrolled in peaksaver®

Hydro One introduced the voluntary electricity Demand Response program peaksaver® originally called Smartstat sometime last year. The program is funded by the Ontario Power Authority (OPA). The program is designed to to ease critical strain on the electricity system in Ontario during hot summer weekdays.  Once enrolled in the peaksaver® program, a new programmable thermostat with a special chip will be installed at your residence.  Hydro One can remotely turned up the central air by two degrees Celsius. 

In actuality what they do is set the thermostat to saving which turns the central air unit off for 15 minutes, once per 1 hour period up to a maximum of 4 hours.  At most this may rais the room temperature a couple of degrees but because the fan continues to run in most cases there won't be a noticable difference in room temperature.  The peaksaver® program can only be activated on weekdays from May 1 to September 30 typically between 2 p.m. and 6 p.m. for a maximum of four hours.  It cannot be activated more than ten times and yet 2008 had 5 activations and 2009 only had 1 activation.  There is a number you can call to opt out in advance of a specified date if you know you will need full air conditioning for that day (1‑866‑380-6051).  So this is not a program that is going to cause a huge inconvenience to anyone enrolled in it.  You can also opt out of the program at any time if you are unhappy with it.

In order to qualify for the peaksaver® program:

  • must have a central air conditioning unit that works
  • live in a single family dwelling (home or townhouse)
  • be the homeowner or have the homeowner’s written permission to participate in the peaksaver® program
Immediate benefits of the program are:
  • a free, professionally installed programmable thermostat ($250 value)
  • a one-time $25 credit on your electricity bill
  • managing your home's temperature from anywhere
  • saving up to 10% on your year-round heating and cooling costs
  • a maximum total of 1 hour reduced air conditioning costs during peak times as designated by Hydro One
In the big picture we stand to gain a $275 value between the thermostat and credit.  We do have a programmable thermostat that was installed with our new central air conditioner (2007) we will not realize the 10% savings on heating and cooling costs.  There are very few times that we would use the remote feature to increase either heat or cooling so at first that benefit didn't really impress us.  However, there are times especially in the winter that we are away for a few hours but because of weather conditions we end up being overnight so being able to remotely lower the temperature will be a nice benefit.  We also are not average users when it comes to air conditioning due to our location.  Our air conditioner unit runs at most about 10 days in a year if that so it's doubtful if we will ever be affected during peak times.  Still I felt this was a worth while program to enroll in.

Garden Gnome
©2006-2010


Wednesday, May 5, 2010

Our SmartMeter is Now Active!


Hydro One came out to install our new smart meter on February 4, 2008.  Silly me, I though somehow it would be activated well before April of 2010!  I'm not sure when the meter was actually activated only that it showed up on our April's hydro bill.  Notice the yellow highlighted that says actual?  Up to this point we have been living with estimate billing in rural Ontario with actual readings only once every three months.  This made it extremely difficult to determine actual daily kWh usage without making the effort to read the meter daily at the same time each day for at least the entire month.  Taking a daily reading at the same time every day for a month is a bit more difficult than you would think because quite frankly life gets in the way.  Eliminating the estimate meter readings is a very much welcomed improvement to our electricity services.  It will help us prepare better for the new TOU rates that will be implemented in the very near future.  At the same time eliminating meter reader is going to reduce the amount of gas used to read the meters especially in rural areas.  I would like to see some type of rebate or cost per kW reduction to compensate for this savings but that is highly unlikely.

In fact in Ontario the only real incentive for saving on electricity is to reduce the kWh used.  Our recent (April 2010) bill was $83.37 with only $32.61 actual kWh used and the rest is service charges and taxes.  This is one reason why we have a renewed interest in getting off the grid entirely.  We are almost at half the average household usage so are already good candidates for going completely solar.  That is our 5 year goal but in the meantime we still have to deal with Hydro One.   

Garden Gnome
©2006-2010


Tuesday, May 4, 2010

Compact Fluorescent Light Output Equivalency Chart


Compact fluorescent lights (CFL) have changed dramatically from the early days of large ballasts that would only allow the bulbs to fit into certain style fixtures.  Not only are the ballasts small the lights themselves are compact and come in a variety of shapes for both indoor and outdoor use.  The lights CFL spiral bulbs are available in a range of wattages and light outputs (lumins) ranging from cool natural light to soft white light.  They are even available in red, green, blue and yellow!  Where you use these bulbs really determines the type of light output your want.

Pictured is the light output equivalency chart for CFL bulbs.  My rule of thumb is to go to lower wattage where possible so most of our bulbs are in the 9 - 13 W range equivalent to 40 W incandescent bulbs.  Notice that both 9 W and 13 W CFL put out the same lumins?  There is no difference in light output to go to 13 W if a 9 W bulb is available and going to 9 W saves 4 W in energy use.  Given the design of our house (main living area including kitchen below grade) I use 15 W CFL bulbs on the lower level because it does need the extra light.  The colour of the light output does make a difference.  The softer lights tend towards a yellowish tone.  I switched out the lower level soft white CFL for daylight CFL and what a huge difference it made.  The light is cleaner and crisper. 


Garden Gnome
©2006-2010


Monday, May 3, 2010

Get Your Defenses Up - It's Bug Time


It's that time of year where insects like to come into the house.  While you will never be able to entirely eliminate insects from getting into your house there are ways to reduce any potential problems.  This is the time to nip any problems before they happen!  Problematic insects tend to be earwigs, centipedes, ants, pill bugs, mosquitoes and flies but there can be many more.  If you have a elder tree on your property Box Elder bugs can be an annoying problem not they are harmful but just in their numbers and the droppings they leave behind.  Here are a few tips:
  • Caulk and seal any possible sources of entry including around wires and pipes coming into your house.  Use expandable spray insulation for gaps larger than a quarter inch.  Use a temporary clear caulk to seal screen frame to the outer frames so insects can't get through any gaps between the screen frame and outer frame.
  • Check all screens, windows  and doors to be sure insects cannot get in.  Repair any tears in screens and seal any cracks around doors and windows. 
  • Remember an open patio door or unscreened entrance door cannot keep insects out.  Keep doors and entrances closed as much as possible. 
  • Remove all food sources for insects like ants.  Place open food bags or containers in sealed glass, plastic or any other barrier ants cant get through.
  • Vacuum, vacuum, vacuum to keep all food crumbs, insect eggs and insect carcasses out to prevent insects that feed off of food, hatching insects and insects that feed off of other insects living or dead out of your house.  Use a handheld vacuum to keep surfaces crumb free between more aggressive vacuuming.
  • Keep all damp clothing, towels and laundry off the floor.  Hang on hooks or racks temporarily to air dry until you have a chance to wash them.
  • Turn outdoor lights off at night or put them on a motion sensor to prevent flying insects being attracted to the light.
  • Use organic methods outdoors to create an insect barrier  5 - feet around the perimeter of your house.  Remove any dead or dying vegetation and wood chips.  If necessary treat the perimeter with diatomous earth or finely ground egg shells. 

Garden Gnome
©2006-2010


Sunday, May 2, 2010

Benefits of a Well Stocked Pantry

I recently read that the average family keeps a 3 day supply of food in their home.  That really surprised me!  I am a firm believer of keeping a  well stocked pantry so a fair amount of energy goes into to stocking a maintaining my pantry for a 2 year food supply.  Between the months of April and October jars and jars of home canned foods are added to my pantry as each type of produce comes into season.  Jars of dried fruits, vegetables and herbs are also added.  Mid spring we pick up our beef on the hoof to restock the freezers and a bit later meat from our pig will be added along with a few pieces of home cured meats.  During the nice weather any fish we catch that isn't used fresh is frozen for use in the winter months.  If we're lucky a bit of venison is added to the freezers as well.  Of course I take advantage of grocery sales for staples like pasta, rices, flours and baking needs.  The question many ask of anyone who keeps a well stocked pantry is why?  The quick answer to this question is there are a multitude of reasons so I'm just going to highlight a few reasons why keeping a well stocked pantry is a prudent idea.

  • saves money -  A well stocked pantry saves a considerable amount of money by removing the temptation to eat out or pick-up take-out food.  Home cooked meals and foods from scratch are almost always less expense than eating out or even convenience foods.  In the time it takes to go out of your way to go through a drive-thru for take-out you can easily make an inexpensive, healthier home cooked meal. 
  • guard against inflation -  A well stocked pantry serves as a guard against temporarily inflated food prices that occur due to produce and grain shortages caused by regional weather.  Recent examples of this has been inflated prices for rice and wheat products.  Use your pantry stocks of temporarily inflated food items until the price returns to normal then restock your pantry.
  • garden failure - A well stocked pantry can help lessen the blow of a year's garden failure.  The weather patterns have been changing which has resulted in violent weather in some areas that quickly can wipe out a garden in a few moments.  In other areas gardens have been wiped out by an unexpected frost.  This is one reason why keeping a two year supply of home canned fruits and vegetables is often recommended.
  • unemployment -  Unemployment can happen at any time as a result of a variety of factors.  A well stocked pantry helps to keep good healthy food on the table during periods of unemployment allowing you to focus on finding employment and freeing up money needed for other necessities such as utilities. 
  • emergency preparedness - Emergency situations can happen anytime, anywhere and when you least expect it.  Part of your pantry storage should include emergency preparedness food supplies.  Additional foods that you may not normally use on a regular basis (eg. powdered cheese, powdered milks) should be part of your emergency preparedness food supplies along with any special needs foods (eg. baby formula).  Your emergency preparedness food supplies should be in the amount that could support your family's needs for a full month and should include safe drinking water. 

Garden Gnome
©2006-2010


Saturday, May 1, 2010

Proof Positive That Less is More

We all know that inflation has increased the price of practically everything but often we are oblivious as to how much.  As long as earnings keep up with our cost of living it is easy to overlook the rising costs of consumer products and services especially when the prices increase in small amounts each time.  For example you likely don't notice when the price of an item increases from $8.97 to $8.99 but you would notice if the same item increased to $12.99.  Another things consumers fail to notice is when the size of a product decreases slightly but they will notice if the decrease is dramatic.

I have been working from my yarn stash to work up a few dishcloths for gift giving.  A few days ago I asked my husband to pick up a skein of Bernat® Handicrafter® cotton 4 ply worsted weight yarn in no specific colour.  He brought me two in varigated colours at $8.27 per skein.  It's been a few years since I've had to buy cotton yarn but I think the last skein I paid somewhere around $6.99 for.  Pictured is the lable from the old yarn on top and the new yarn on the bottom.  Not only did is the new yarn more expensive there is 2 oz (60 gr) less of it!  To add a bit of further insult the old yarn label included 5 dishcloth patterns while the new yarn label only has 3 dishcloth patterns.  So all around I'm getting less product for more money and the labels prove it!

Garden Gnome
©2006-2010