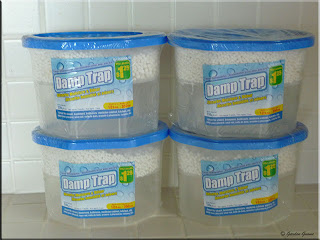
The main living level of our house is mainly below grade similar to a walk-out basement but a bit different. Any area below grade is subject to higher humidity levels so the area is cooler with a hint of dampness. We are quite lucky that our lower level walls are about 18 - inches thick and well insulated. In addition to that we have done a lot of air sealing. On rainy days mainly spring and fall or on high humidity level days in the summer the lower level feels a bit damper which is quite normal. Once we solved the plumbing/drainage problems moisture late last summer we noticed the lower level wasn't as damp in the fall. Dampness can cause odours, molds, mildew and attract insects. Our dampness issue is not bad enough to warrant running a dehumidifier.
Each moisture trap will absorb up to 12 oz of moisture and lasts about 3 months. They are easy to use as well. Once the plastic wrap is removed a foil seal needs to be removed then the plastic cap put back on. Simply set the damp trap where desired and forget about it for about 3 months. That's it!
When the calcium chloride pellets are absorbed there will be a good layer of water under where the pellets were sitting. Remove the white moisture-permeable white layer and dump out the water. The containers can then be tossed or cleaned out for the recycle bin or used in the garage.
The moisture traps do look rather groatty with the water layer being dirtier in some traps depending on where they were. I clean the used moisture traps out then put them into the recycle bin. I think this is a low cost, non-electric but effective way to solve minor moisture problems. It costs about $9 per year for the number of moisture traps we use.
Garden Gnome
©2006-2010


0 comments:
Post a Comment