What does a Garden Gnome do when she is not gardening, in the kitchen or doing genealogy? Well the answer might just surprise you so read the entries to find out more. This blog focuses on everything we do to make our house a home. There will be a strong emphasis on home energy efficiency and do-it-yourself (DIY) projects. At the same time there will also be crafts, knitting and crocheting projects along with any other little tips we do to create that down to earth, I want to be here home. Please enjoy your visit :)
Accidents happen around the house in the best of circumstances but when moving or settling in they are even more prone. This is the time that little nicks and dings often happen. While the nicks or dings don't affect the overall function they can make the appliance or piece of furniture look less than appealing. There are a wealth of repair kits available for doing quick touch-ups for most furniture and appliances. Most of these kits will cost less than $5 and with carefully following the instructions you can get a good, barely noticeable DIY repair.

The kitchen appliances in the vacation house are Maytag. Quite frankly for this repair brand did not matter because each appliance manufacturer uses a slightly different colour if white to the point that a matching washer and dryer may not exactly match. We are avid DIYers so that means even at the vacation house we will do it ourselves if at all possible. My husband was removing the filter from the overhead built-in dishwasher when the screwdriver he was using slipped out of his hand crashing down onto the stove. This left a rather nasty looking chip. The chip could have been left as is but would be unsightly. It would get worse over time with likely a bit of rusting. We stopped at Home Depot to buy Porca-fix to fix the chip immediately.
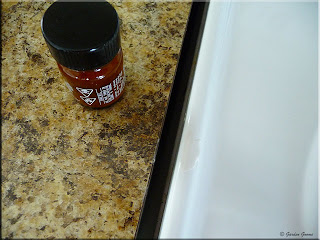
Porca-Fix is one brand of appliance chip repair products. There are others but this formula will only need one application. It is about $5 for the small bottle but most repairs you will only need a drop or two from the built-in applicator. It is rather easy to use with no special skills required.
To use simple clean the chipped area good and be sure it is dry. Then using the applicator dab on a drop or two. If it runs a little wipe the drip with a paper towel. The patch will be raised which is normal. Let the patch dry fully. Once the patch is fully dry it can be fine sanded using the provided sandpaper to give a smooth, barely noticeable repair.

I let the patch dry for about 8 hours then sanded it. The sanding brought the patch down to the same level as the original stove finish. To the touch the patch is not noticeable at all. If you look very close and know what you are looking for you might just barely notice the slight colour difference of the patch depending on the lighting. This is something that cannot be helped given the colour variances in appliance manufacturers. Your best results will be with black or white. There is ivory but what is now called ivory is a lighter version of almond so if your appliance is actually almond then the repair will show a bit more but if done properly should still give good results. At any rate this is an easy way to keep your appliances looking nice if a chip should happen.


2 comments:
I follow your blog for a long time and must tell you that your posts always prove to be of a high value and quality for readers. Keep it up.
Thanks so much Nazia :)
Post a Comment