What does a Garden Gnome do when she is not gardening, in the kitchen or doing genealogy? Well the answer might just surprise you so read the entries to find out more. This blog focuses on everything we do to make our house a home. There will be a strong emphasis on home energy efficiency and do-it-yourself (DIY) projects. At the same time there will also be crafts, knitting and crocheting projects along with any other little tips we do to create that down to earth, I want to be here home. Please enjoy your visit :)


Showing posts with label flooring. Show all posts

Monday, November 21, 2011

The Downside to Hard Surfaces

Hard surfaces are so much more health friendly, reducing the allergen level when properly cared for but there is a down side.  Thursday night I started reacting to something in the house.  The reaction became steadily worse over the weekend with two asthma flare-ups.  The problem with hard surfaces is the allergens are just there, free to become airborne unlike when they settle into carpeting where they are slowly released back into the air.  An allergic person will still react but because it is a slower release the reaction is not as severe however, in a home where there are fewer hiding places for allergens, the allergic reaction can be more severe.  That's what I'm experiencing and so far it hasn't been pleasant. 

Garden Gnome
©2006-2011


Monday, October 3, 2011

Hard Flooring in the New House

One of the biggest selling features for our new house was the complete absence of carpeting.  Years ago my allergist was adamant that we should remove all carpeting from our house.  Carpets are horrid breeding grounds for dust mites.  There are three work around with the first being removing carpeting entirely.  The second is using a pesticide that is mite specific but this is not the best solution as it can cause allergic reactions as well as introducing a toxic chemical into your home.  The third solution that will not work in warm locations is to let the indoor air temperature drop below 50°F for at least a 24 hour period.  This will cause a kill-off of dust mites reducing their numbers.  Do a thorough vacuuming immediately to remove the dead dust mites.  The important thing to remember is keeping the dust mite population down reduces the amount of dust mite feces which is the actual allergen.

ceramic tile flooring
The previous homeowners installed higher end ceramic tile in the entrance, part of the family room and both bathrooms.  The upper bathroom is a marbled dark hunter green (pictured) and the lower bathroom is a marbled deep burgundy.  The entrance is a beige textured tile while the family room is a greyish blue textured ceramic tile.  Not pictured and not related to the flooring, the kitchen countertop and backsplash are also tiled in terrazzo tile.

Ceramic tile is extremely easy to care for.  According to our ex-BIL who was a flooring installer the only thing that should be used on ceramic tile flooring a a solution of vinegar and water.  Vinegar has antibiotic properties and cleans as well as expensive cleaners without leaving any cloudy film.  It also neutralizes household odours so it freshens the air while cleaning the floors.  In our last house when I was getting the house ready for showing I would wipe down the shiny ceramic floor in the kitchen with rubbing alcohol for a sparkly finish.  All the tile at the new house is textured so I will just use vinegar and water or my Bissell steam mop.
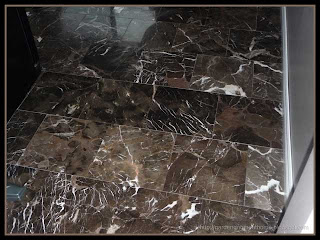
marble tile flooring
I am not a huge fan of smooth, shiny floors in kitchens because they tend to me a slip and fall hazard.  The floor in our new kitchen is marble tile and oh my gosh, I love it!  It is rich and luxurious feeling.  Dirt and sand can scratch marble tile flooring so I'm using an electric broom daily.  Really though this is nothing new as kitchen floors usually need to be swept or vacuumed daily.  I'm rather particular about my kitchen floors, wiping up spills as they happen and cleaning daily.  I kept the dustbuster handy in my last kitchen to keep any crumbs off the floor as part of rodent control.  Marble is a porous stone so harsh chemical cannot be used on it.  It is important to use pH-neutral cleaners so no vinegar, alcohol and many of the commercial cleaners.  Spills should be cleaned up to prevent staining as well.  I will be using my Bissell steam mop for cleaning the marble flooring.
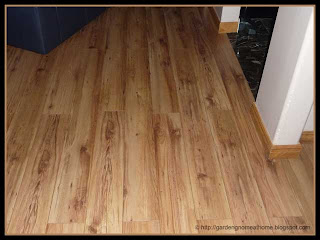
laminate flooring
All five bedrooms, living/dining rooms, part of the family room and staircase are laminate wood flooring. [ We aren't using all five bedrooms as bedrooms - one is an office, one a dart room, one a pantry, one a guest room and one the master bedroom.]  Laminate wood flooring is very easy to care for with the primary concern being over wetting.  There is no way I could use my Bissell steam mop on the laminate flooring.   I bought a light mop device that I can put my own solution into.  So far I have been using a dust mop daily which really is not as much work as it sounds.  It takes me less that 10 minutes and is good exercise.  I've cleaned the floors a couple of times using the light mop.

The nice thing about having no carpeting is ease of cleaning as well as the reduction of a major allergen.  The scary part is realizing all that dust and daily living particles was going into your carpeting.  While we may use a throw rug or two during the winter and definitely an entrance mat there will be no carpeting in our house.  I'm loving it!

Garden Gnome
©2006-2011


Saturday, March 20, 2010

Installation of Laminate Flooring

When I decided on a flooring for the room that was to be the craft room I chose laminate flooring. I thought this would be a great choice for a craft room providing easy to care for, low care clean up. At the same time using hard flooring fit with our eco-friendly ideal of removing all carpeting from our house. Carpeting is a huge dust and allergen magnet as well as costing continual electricity to keep clean via vacuuming.

installation of laminate flooring in progressIn Progress

A laminate floor is a floating floor with quarter inch space around the perimeter for expansion. While this is a DIY project we had never done it before and because the house is already listed we needed to get this room in showing condition in the least amount of time. The flooring was hired out but I kept a close eye on how it was done.

A thin padding is laid on the subfloor. This serves to help reduce noise while cushioning the floor. The flooring comes in tongue and groove panels that need to be snapped into place. Really it is more like tapping them into place to form a tight fit.

laminate flooring installedInstalled

Once the flooring was installed, the new baseboard was installed. The only thing left to do was the final clean-up. I swept the floor then damp mopped it with a solution of Murphy's Oil soap. I am quite pleased with the overall results. The look is clean, crisp and definitely what I was after. Don't you think it just looks gorgeous?

Next up for finishing this room is the replacement of all the electrical outlets and sealing the trim seams so they don't show. We are now down to the final finishing touches for this room. I'm saddened that this will not be my much coveted craft room. It just has such great creative vibes already! Instead the room will be staged as a bedroom for the sale of our house. However, I am very much encouraged by how this room came out so will be using these lessons learned in our new home.

Garden Gnome
©2006-2010


Tuesday, March 16, 2010

Laminate Flooring

Just a day before the news came that would result in major life changes we tore apart a spare room to turn it into a craft room. The news ultimately meant we would be selling this house in return for two houses. The problem remained that even though we decided to sell the house we still had to finish this room otherwise the house would not show well. The kids finished up the painting for us which left the trim and flooring as well as updating the light fixture. This is one thing to keep in mind that sometimes you have to spend a bit of money in order to sell your house.

laminate flooringLaminate Flooring

The flooring arrived Friday morning but would not be installed until Tuesday as it had to acclimatize to the room. We chose a birch finish laminate flooring taber test IP=11,000 for heavy to moderate commercial use with 25 year warranty against wear, stain and fading.

Pictured are the 6 cartons of the laminate flooring and roll of underlay. We have never installed laminate flooring before so a friend who installs a variety of floors for a living is installing it for us. I will be keeping a close eye as to how this type of flooring is installed. We already have plans to remove all carpeting in the new house with possibly laminate flooring being installed in the 3 bedrooms.

Garden Gnome
©2006-2010


Wednesday, February 10, 2010

Day 2 of Craft Room Remodel

Originally when we started the bedroom remodel to a craft room last Wednesday. What started as a simple pull up the carpet, refinish the floors, paint and furnish has taken a couple of spins. That's ok and to be expected with any renovation. No renovation goes smoothly. It is obvious the renovation is going to take us a bit longer to complete simple because we have to get to the GTA to pick up a storage system from IKEA. We didn't bank on a bit of winter weather hitting. At the same time we now find ourselves shopping for a floor which is actually snowballing into doing the floors in the adjoining hallway and adjacent guest room.

peeling back the carpetRemoving Carpet

Given the age of our house I knew hardwood flooring would be on the upper level. When we peeled back a corner of carpet and padding we discovered a relatively new looking plywood subfloor. Another thing we discovered is the original plaster walls had been covered with drywall. The red arrow shows a gap between the new drywall and the new plywood subfoor on the longer outer wall that was letting a lot of cold air in. I have to tell you I love windy days for finding these kind of air leaks! At least I know how to fix air leaks. The furthest corner not pictures was letting in so much air that it had to be getting through even with the drywall tucked under the drywall edge. I was happy we found this air leakage!

floor discoveryFloor Doscpveru

There is one HVAC vent in the room. We removed a piece of the new subfloor on a short side of the vent to see what was under it. There as I knew there would be was my hardwood floor. Talk about discouraging. The subfloor is nailed about every 8 inches so the chances of being able to remove the plywood without pulling chunks out of the hardwood below is very slim. Then there is the issue of having to repair and refinish the floor that will likely still show the nail holes. The sad part is the 2 bedrooms, hallway and what is supposed to be a good living room hardwood flooring have been covered with plywood but the games room we found has not been so in order to put the floors at one consistent level on the upper story we have to either put down subflooring in the games room or remove the existing plywood subfloor. See how a project can esculate?

end of the dayEnd of the Day

By the end of the day my husband had removed all of the carpeting and most of the underpad. The painters aka one of our kids and a friend were coming to prep the walls and paint the ceiling. They were picking up the paint for us as well so the intentions were good but the room decided otherwise.

At the end of day 2 the room was ready to be prepped for painting except we had to deal with the gap letting in air. For the most part the walls needed little prep except around the window frames where curtains were hung. This actually gave a hint to the next problem we would encounter but that is next post.

Garden Gnome
©2006-2010


Friday, February 5, 2010

Flooring

I mentioned in my last post how upset I was to discover that a plywood subfloor had been nailed down over hardwood. While we wait for an answer on restoring our hardwood floors I thought I would share some of my thoughts on flooring. I detest carpeting! Carpeting has to be one of the most eco-unfriendly things in your house. It holds and traps so much dirt and allergens. It is home to the wonderful dust mite that can cause a host of problems for those allergic to them. At the same time carpeting cost you to vacuum and steam clean both of which cause further problems as far as air quality and/or increased dust mites. My goal has been to get rid of all carpeting in our home. I could maybe handle an area rug for the winter but other than that I want my floors bare. No vacuuming, no steam cleaning and no ugly stains! At most I will have to damp dust a few times a week but that doesn't use electricity and it really wouldn't take more than about 15 minutes. So that means we are in the process of removing every bit of carpeting from the house as quickly as we can replace it with hard flooring.

I'm leaning towards restoring the upper level hardwood floors if at all possible. In the lower level we will be using laminate flooring in the master bedroom as it is below grade and hardwood shouldn't be used. The pantry and laundry rooms already have sheet flooring that don't need replacing and while the kitchen has ceramic tile we will be replacing it. The open concept family room and small bathroom will be tiled as well. I should have the first of the craft room renovation posted tomorrow so be check back.

Garden Gnome
©2006-2010


Thursday, July 12, 2007

Reviving Sheet Flooring


We do not wear shoes indoors so clean floors is very important to me. The bathrooms, utility room and walk-in pantry in this house have older sheet flooring. My husband took one look at the utility room and in an appeasing voice promised new flooring. But I had other plans! The floor itself was in good condition just very dirty looking. It wouldn't have been flooring I chose but it works well for the room and besides we have enough to do that the money for new flooring would be better spent elsewhere.

So I pulled out my trusty bottle of household ammonia and tested a small area in the corner. Just as I suspected, the area came up considerably cleaner so now I knew what I was up against. Sheet flooring can become dirty looking from dirt or wax build-up or a combination of waxing over not quite clean floors and trapping the dirt in between layers of wax. I suspected in this case it was several wax layers trapping dirt combined with surface dirt. I decided to do a larger patch to see if my suspicions were correct. I picked up another bottle of household ammonia and a stiff scrub brush from the dollar store*. Armed with a large bowl of water and rags for wiping down the area after cleaning I set to work (1). The ammonia solution thickened as I scrubbed the larger patch so I knew for sure there was a heavy wax build-up.

There is no doubt about it, this is a hands and knees cleaning job. Ammonia is hard to work with for any length of time especially for those like me with respiratory problems. It is essential to work in a well ventilated space for short periods at a time when using ammonia full strength. My method was to pour the undiluted ammonia onto the floor then scub with the brush spreading the ammonia in about a 2 square foot area. I had the ceiling fan on as well as all windows in the area wide open. As the ammonia became thick with the built-up wax and the ammonia smell dissapated somewhat, I wiped down the the section with clean water. Wiping the section well with clean water is very important to prevent any wax from resettling on the floor. The edges of each section remain sticky for quite some time allowing the next section to overlap and remove all the wax and grime. Then I would take a ten to fifteen minute break and do another section. By mid-afternoon almost half of the room was finished (2) and by the time my husband arrived home only a large strip in front of the utility room door remained (3). I was very pleased with my frugality and the outcome so proudly told him to come and see what I had done. He could not believe how the floor came out looking like new! The next morning I finished up the large strip with the final picture taken (4) at the entrance between the family and utility rooms. Once the entire floor was cleaned, I went over it again with clear water checking for any sticky spots. This particular sheet floor still has a wonderful shine to it even though I did not wax it but some floors will come up dull after cleaning so will need a coat of good quality floor wax. For a total cost of $4.50 and a little elbow grease the floor ( ~ 10' x 10') looks like brand new! Not bad, eh?

*Watch for a post on dollar stores shortly as many available household items can really help stretch the dollar when renovating, decorating or simply cleaning a new to you home.

Garden Gnome
© 2007