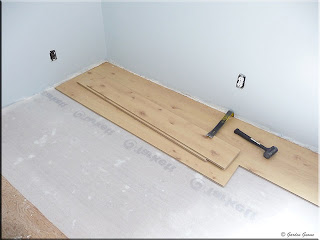
When I decided on a flooring for the room that was to be the craft room I chose laminate flooring. I thought this would be a great choice for a craft room providing easy to care for, low care clean up. At the same time using hard flooring fit with our eco-friendly ideal of removing all carpeting from our house. Carpeting is a huge dust and allergen magnet as well as costing continual electricity to keep clean via vacuuming.  In Progress
A laminate floor is a floating floor with quarter inch space around the perimeter for expansion. While this is a DIY project we had never done it before and because the house is already listed we needed to get this room in showing condition in the least amount of time. The flooring was hired out but I kept a close eye on how it was done.
A thin padding is laid on the subfloor. This serves to help reduce noise while cushioning the floor. The flooring comes in tongue and groove panels that need to be snapped into place. Really it is more like tapping them into place to form a tight fit. Installed
Once the flooring was installed, the new baseboard was installed. The only thing left to do was the final clean-up. I swept the floor then damp mopped it with a solution of Murphy's Oil soap. I am quite pleased with the overall results. The look is clean, crisp and definitely what I was after. Don't you think it just looks gorgeous?
Next up for finishing this room is the replacement of all the electrical outlets and sealing the trim seams so they don't show. We are now down to the final finishing touches for this room. I'm saddened that this will not be my much coveted craft room. It just has such great creative vibes already! Instead the room will be staged as a bedroom for the sale of our house. However, I am very much encouraged by how this room came out so will be using these lessons learned in our new home.
Garden Gnome
©2006-2010


4 comments:
The floor looks great. We actually did a Pergo floor in our kitchen that looks like stone tiles. We learned a lot of lessons from doing it though. It was a glued system and my husband did all the work (up for sainthood), but the end result is awesome.
good work .. the floor.. look shine. but in my place we usually use a rock with a cement as a glue
Hi Carol and thanks for visiting. I just saw a program on HGTV on the installation of a glued system. It looked like a bit more work than the floating system. Is there an addition benefit to gluing?
Hi pandi and thanks for visiting. Thanks for the compliment. Do you mean tile flooring? We usually don't put that in bedrooms here. Instead we use tile flooring for kitchens, baths and entrance ways.
Post a Comment